

Creality Sermoon P1 Review: Is a $3,299 3D Scanner Actually Beginner-Friendly?
Published Oct 12, 2026
Includes affiliate content
Pro-grade scanning, through the eyes of a complete beginner.
The Creality Sermoon P1 is the first 3D scanner I’ve ever used, which admittedly puts me at a disadvantage when it comes to comparing it with other professional scanning equipment. But at the same time, it gives me a useful perspective on something that matters just as much: how approachable is a device like this for someone starting from scratch?
A lot of you might be asking the same question, and I can tell you right off the bat that, as it turns out, this scanner is surprisingly approachable and intuitive. The Sermoon P1 combines blue laser and infrared scanning tech, a large touchscreen, powerful onboard processing and swappable batteries in a handheld device that can be used completely standalone. You can scan, process and export a model without ever connecting it to a computer, or plug it into a capable PC or Mac to unlock faster scanning and a more comfortable workflow.
After spending time scanning everything from a tiny Coca-Cola bottle and Hollow Knight figurine to a full-size Boba Fett helmet and a barrel-shaped Breaking Bad Blu-ray set, I came away seriously impressed by both the quality of the results and how quickly I was able to get the hang of it.
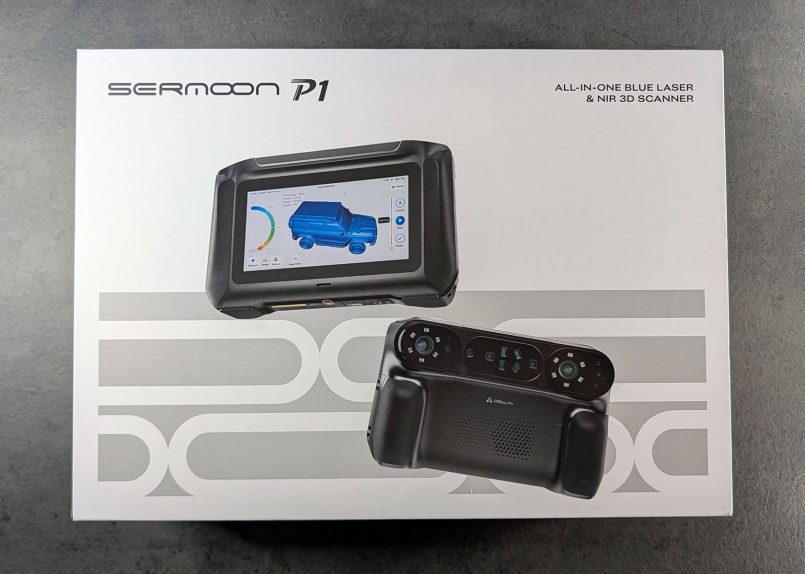
What’s in the Box
The unboxing experience feels premium, and a big part of that is the excellent protective carry case included with the Sermoon P1. This is a device designed to offer pro-grade scanning anywhere you go, whether you’re in a studio or on the road, so the fact that Creality included a sturdy case to keep the scanner and its accessories secure makes a lot of sense.


Inside the box, you’ll find the Sermoon P1 itself, a high-precision glass calibration board, an additional battery, a few sets of reflective markers, a 6.6 ft (2 m) USB 3.0 Type-C cable, power adapter with connectors for different regions, lanyard, cleaning cloth and the portable case with a detachable strap. The usual documentation is also there, including a quick-start guide and warranty card.
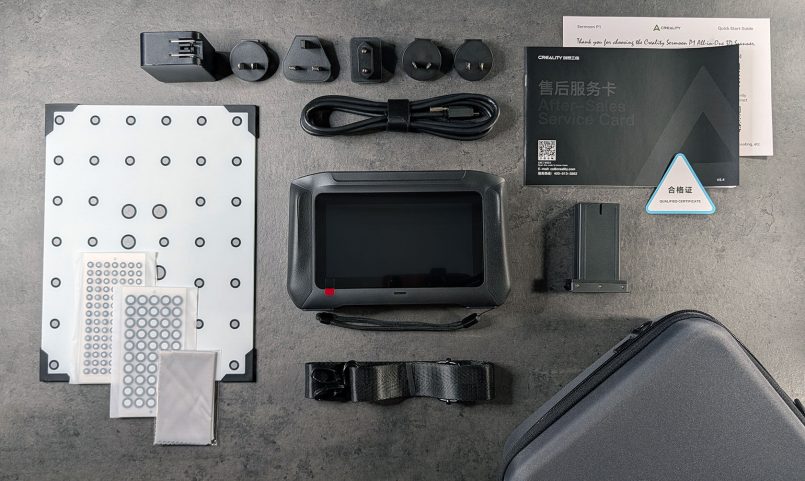
The spare battery is a welcome inclusion. This is a portable device you’ll want to take away from your desk, so having that extra battery allows you to keep going instead of having to stop halfway through a scanning session.
Specs & Pricing
The Sermoon P1 is currently listed at Creality’s US store at around $3,299, with regional pricing sitting at £3,099 in the UK, CA$4,649 in Canada and AU$5,799 in Australia. This is a compact scanner, but there’s a lot going on under the hood. Here are the key specs:
| Scanning modes | 22 crossed blue laser lines, 7 parallel blue laser lines, single blue laser line, NIR (infrared) structured light |
| Accuracy | Up to 0.0008 in (0.02 mm) laser / 0.003 in (0.075 mm) NIR |
| Wired laser scanning | Up to 100 fps |
| Standalone laser scanning | Up to 60 fps |
| Processor | 8-core Qualcomm, up to 3.36 GHz |
| Memory / Storage | 24 GB LPDDR5X / 256 GB |
| Display | 6-inch (15.2 cm) HD touchscreen |
| Battery | Two removable 3,300 mAh batteries |
| Charging | 65W PD 3.0 / ~80% charge in ~50 min |
| Weight | 1.8 lb (830 g) |
| Dimensions | 8.2 x 5.1 x 2.1 in (209 x 129 x 53 mm) |
| Connectivity | USB-C, Wi-Fi 7 |
| Desktop support | Windows and macOS |
| Output formats | OBJ, STL, PLY |
| Mounting | 1/4″-20 tripod thread |
When connected to a computer, blue laser scanning can run at up to 100 fps compared with up to 60 fps in standalone mode. Infrared scanning is slower, but has its own advantages, as you won’t have to use markers and you get RGB color capture. The scanner can also operate wirelessly with a computer, although most of my testing was either completely standalone or through a wired USB connection.
Design & Build
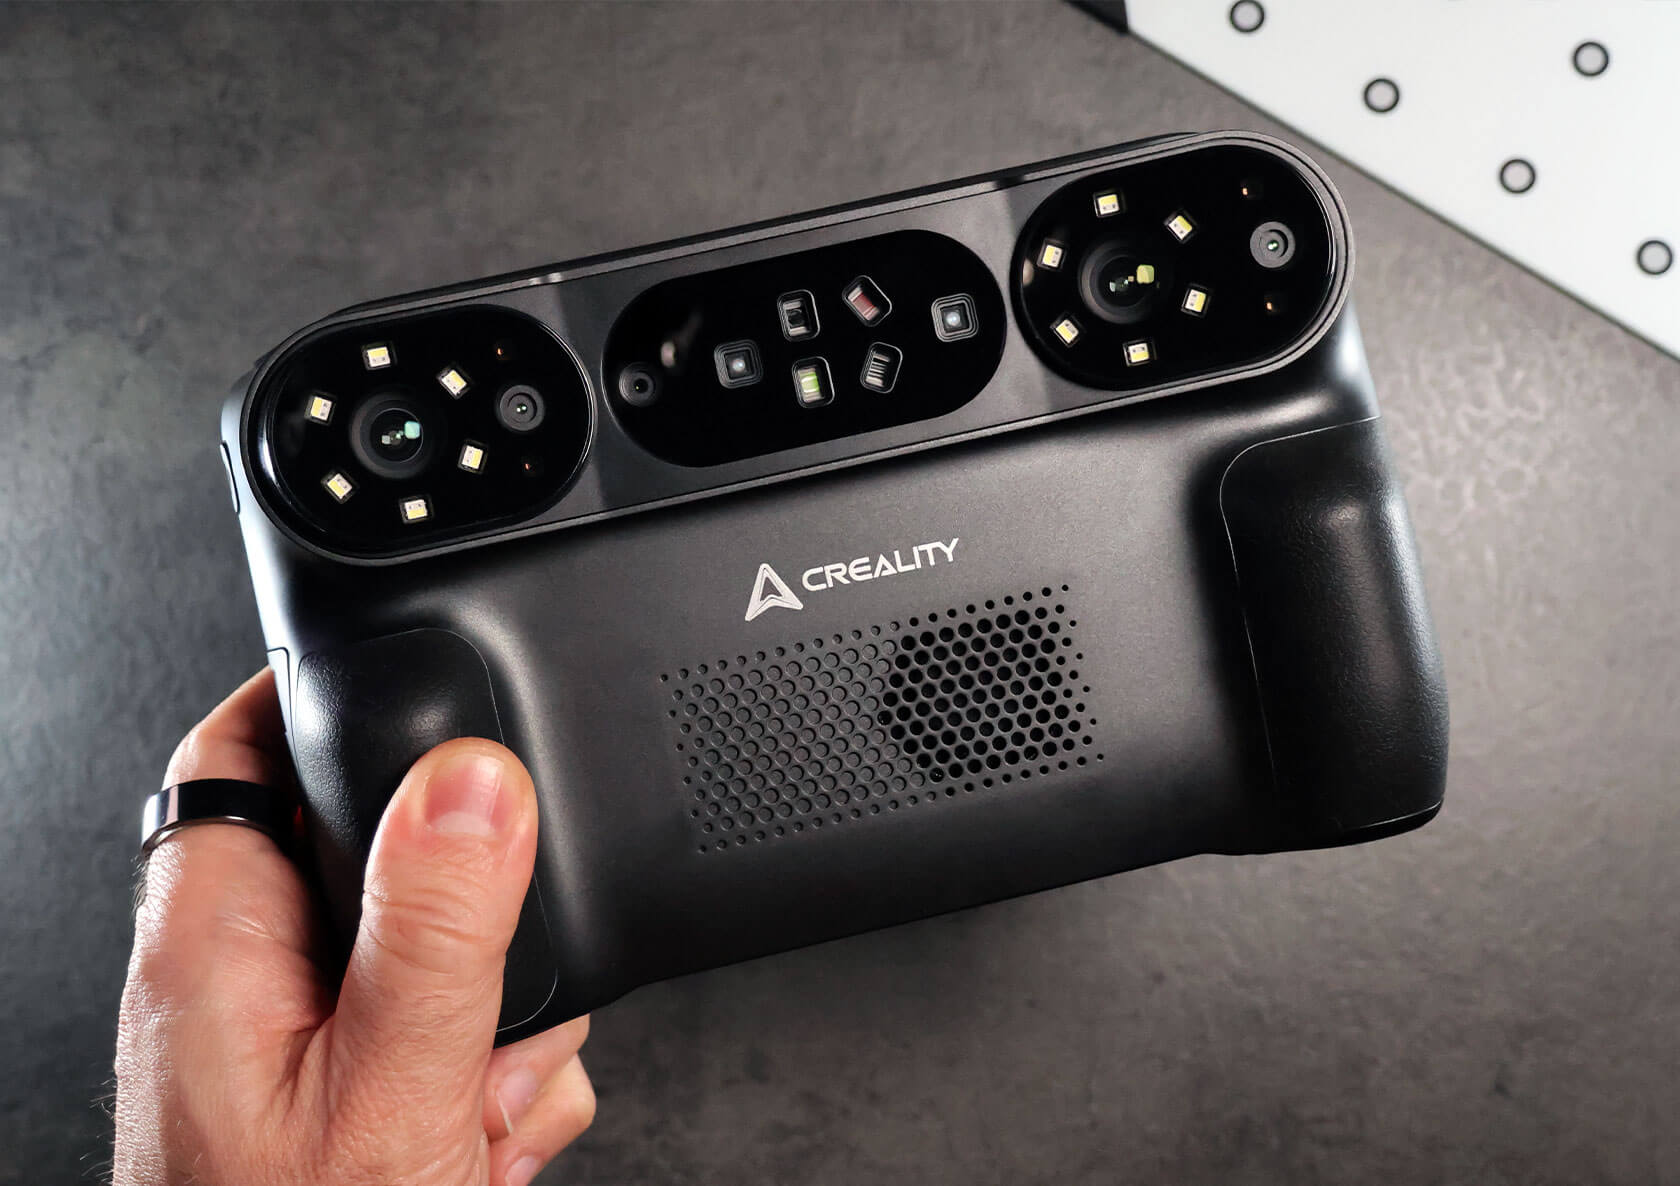
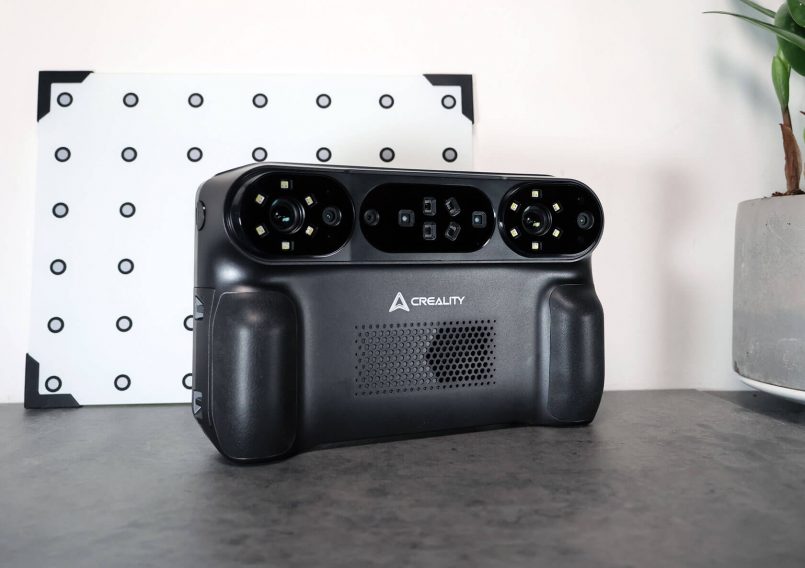
At first glance, the Sermoon P1 looks a bit like a chunky gaming handheld (minus the D-pad and face buttons). It’s sleek, well-built, and the ergonomic rubber grips make it comfortable to hold, even though it’s not a light device at all, weighing 1.8 lb (830 g).
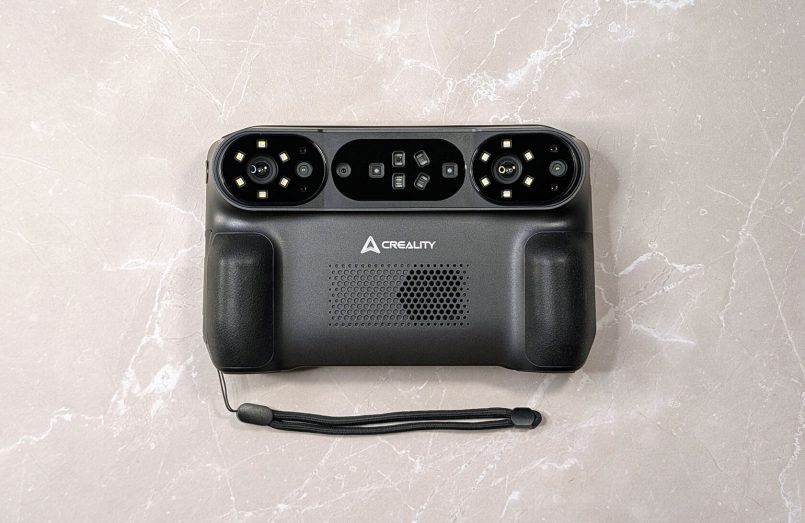
That weight is something you start to notice during longer scanning sessions, but the design distributes it well and I never found the scanner awkward or hard to handle around an object. There’s also a standard tripod socket underneath if you’d rather mount it for certain jobs. That can be useful for steadier, more precise scans, particularly when paired with a rotating turntable.
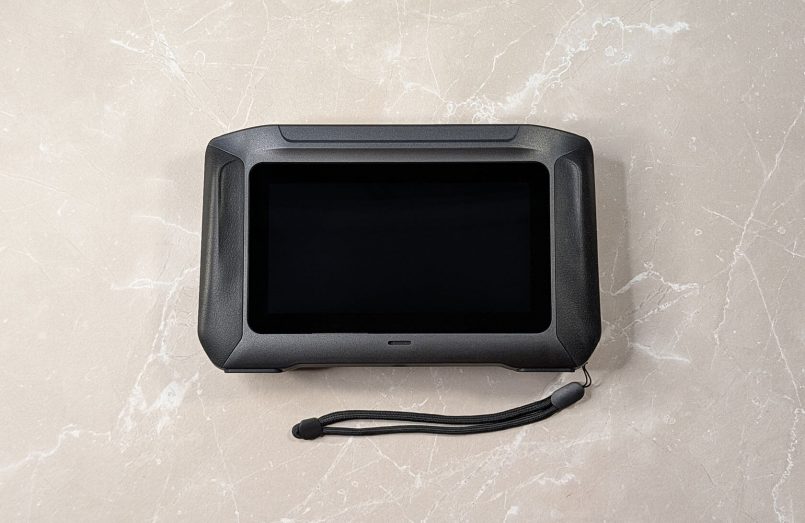
The large 6-inch touchscreen takes up most of the front, and gives you a clear real-time view of the model as you’re scanning. Directly below that is a small speaker opening, used for alerts as well as the built-in first-time tutorial. There are also some small holes for the included lanyard around the lower corners.
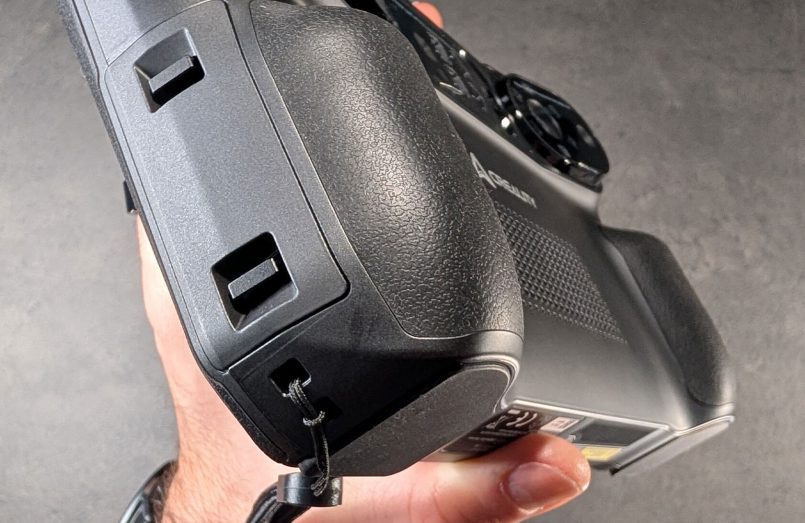
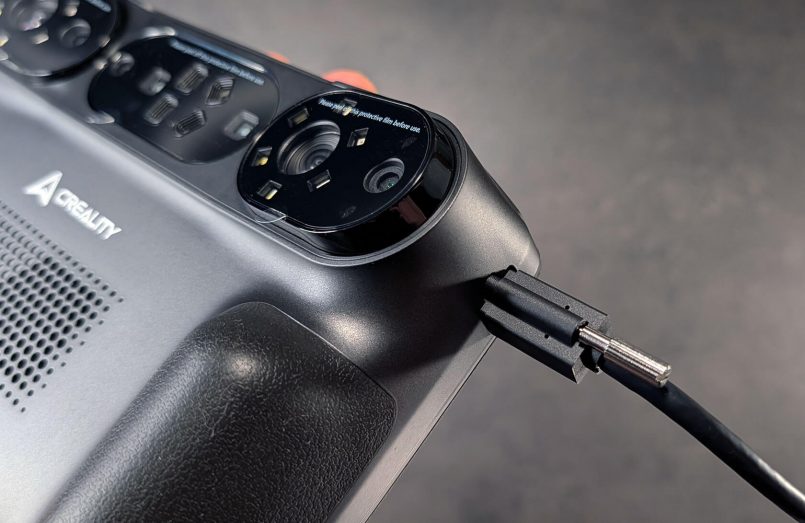
The USB-C port for charging and wired connections sits on the left side. On the right you’ll find the removable battery compartment and a physical “play” button to start and stop scans. This button falls naturally within reach of my index finger when I’m holding the scanner, but I found myself using the touchscreen most of the time, since the on-screen controls allowed me to do a lot more than simply starting and stopping scans.
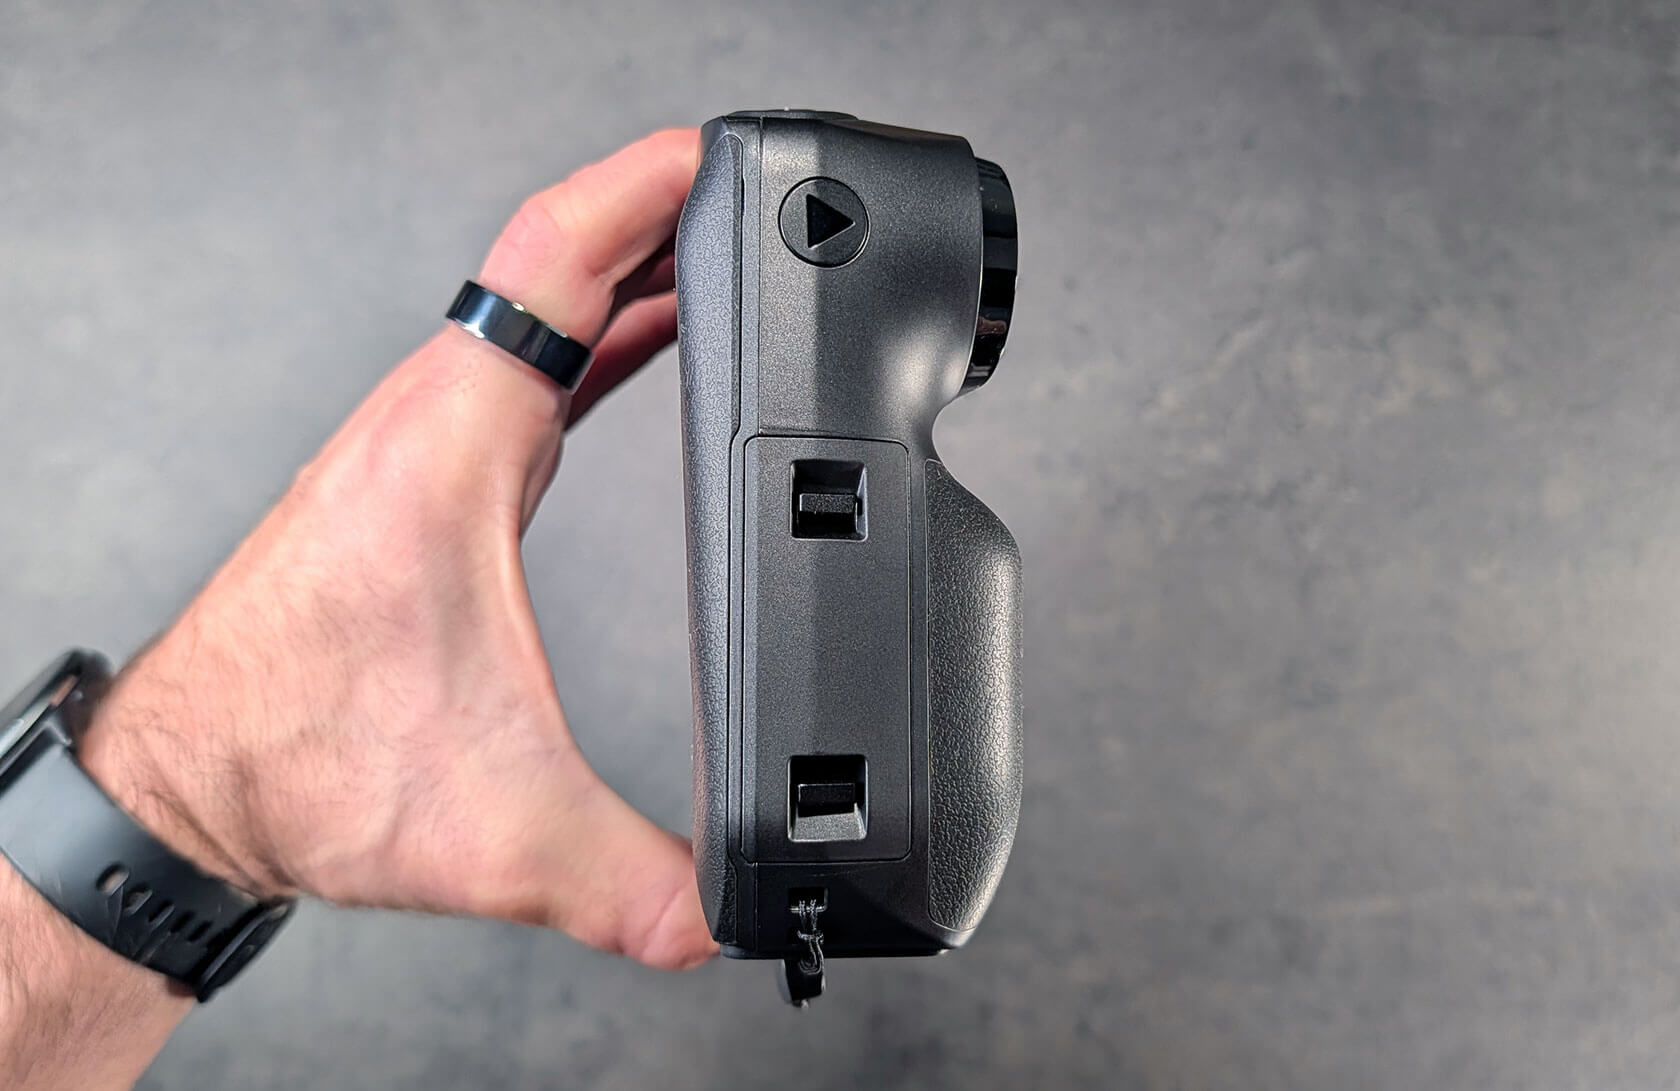
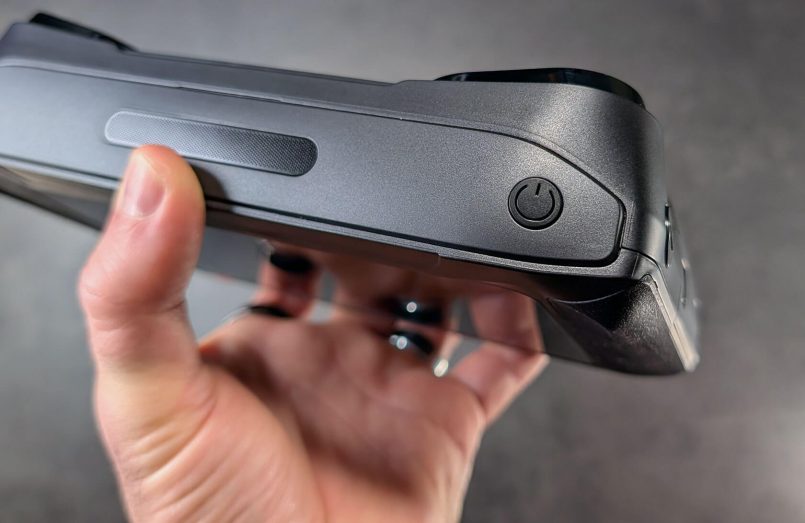
The power button sits along the top, and an impressive array of lenses, cameras and lights are spread across the back. Even before you know exactly what each component does, it certainly looks like serious gear.


But the tech inside is what helps make this thing really portable. The P1 isn’t just a scanner that happens to have a screen attached. It packs an 8-core Qualcomm processor, 24 GB of RAM and 256 GB of internal storage, allowing the entire process from scanning through to mesh generation and basic cleanup to happen directly on the device, which is fantastic.
Initial Setup
Coming into this review with no previous 3D scanning experience, I expected setup to be one of the more challenging parts of the process. But it really wasn’t.
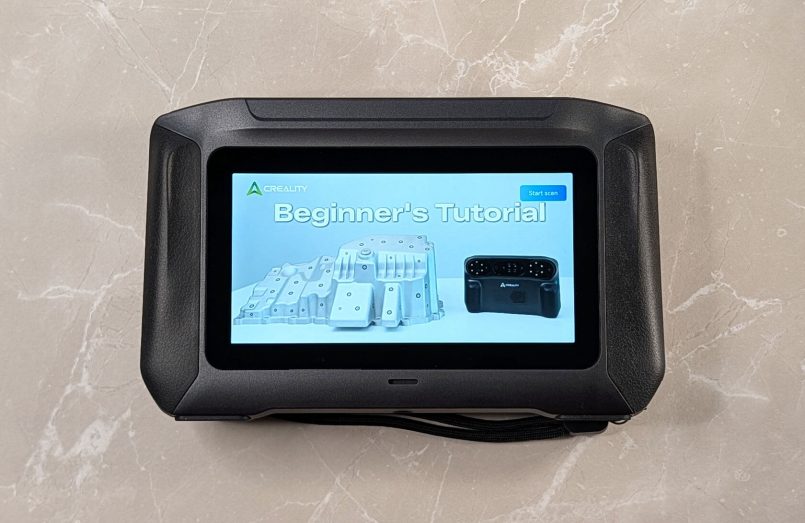
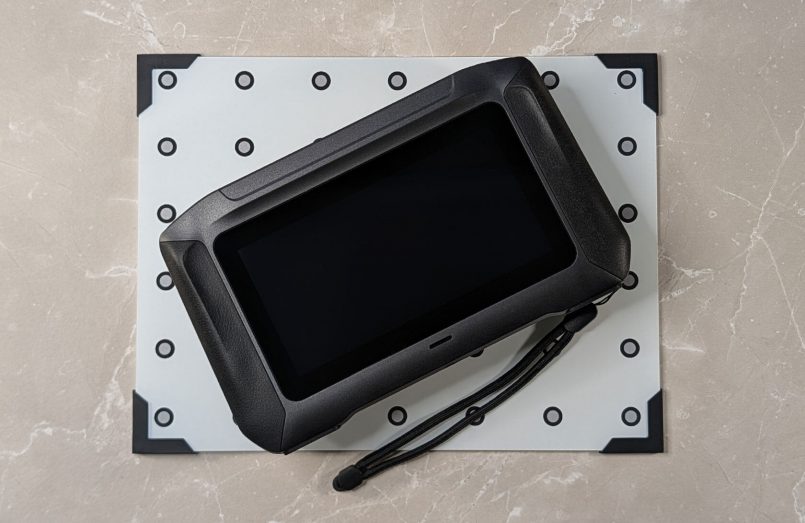
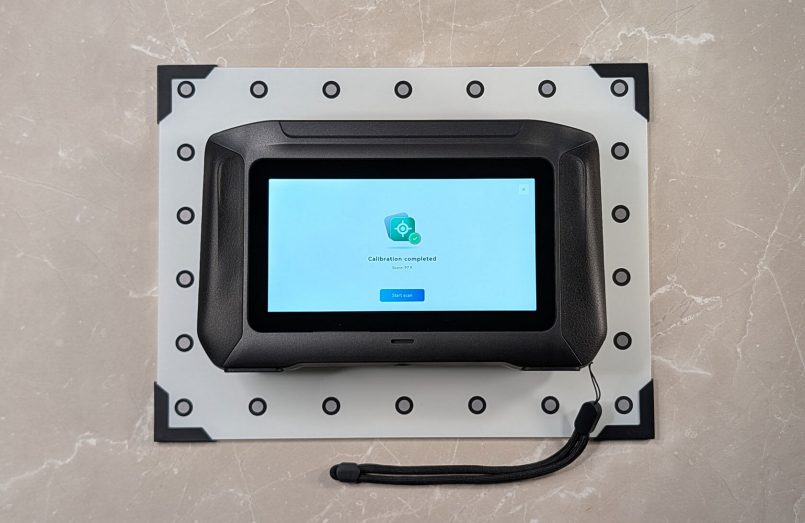
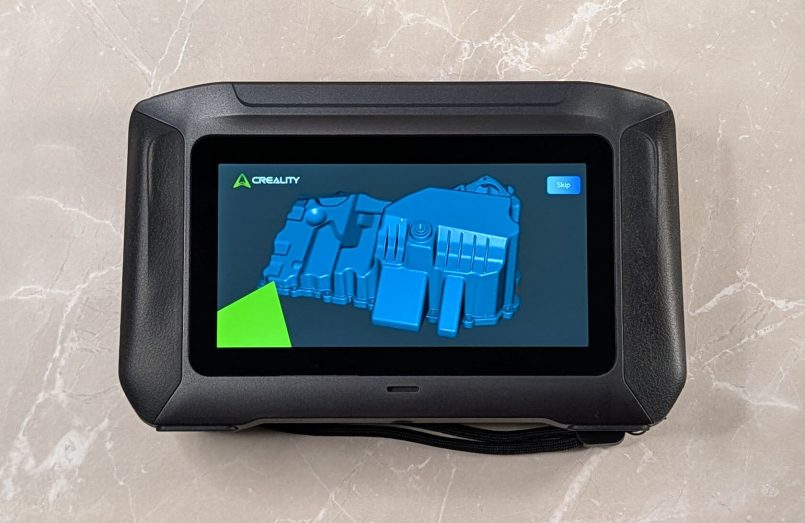
When you power it on for the first time, the P1 plays a narrated tutorial that takes you through the basic controls and walks you through calibration using the included glass board.


There is still a little patience involved, particularly when you’re learning how far to position the scanner from the board or a real object, but Creality does a good job of explaining the fundamentals. As a newcomer, I really appreciated the hand-holding here.
Scanning Performance
The Sermoon P1 gives you four main ways to approach an object. Infrared structured light is the easiest way to jump in because it can track suitable objects without reflective markers. The 22 crossed blue laser lines prioritize speed, the seven parallel lines sacrifice some of that speed for finer detail, and the single blue laser line is designed to reach into deep holes, narrow gaps and sharp recesses. Creality says this one can capture holes with a depth-to-diameter ratio of up to 6:1.
Standalone mode works well and is the whole point of a device like this, but if you have a decent computer nearby, plugging in improves the experience and the results. Using the P1 with a MacBook Pro M4 Max with 64 GB of RAM, I was pulling high frame rates (around 90 FPS and up) and noticeably more detailed scans than standalone.
I spent most of my testing time with infrared, crossed laser and parallel laser modes, trying objects with very different sizes, materials, colors and levels of detail.
Starting Simple With Infrared
For my first proper attempt, I deliberately kept things simple. I grabbed a small commemorative Coca-Cola bottle and scanned it using infrared mode without any markers. It worked incredibly well.
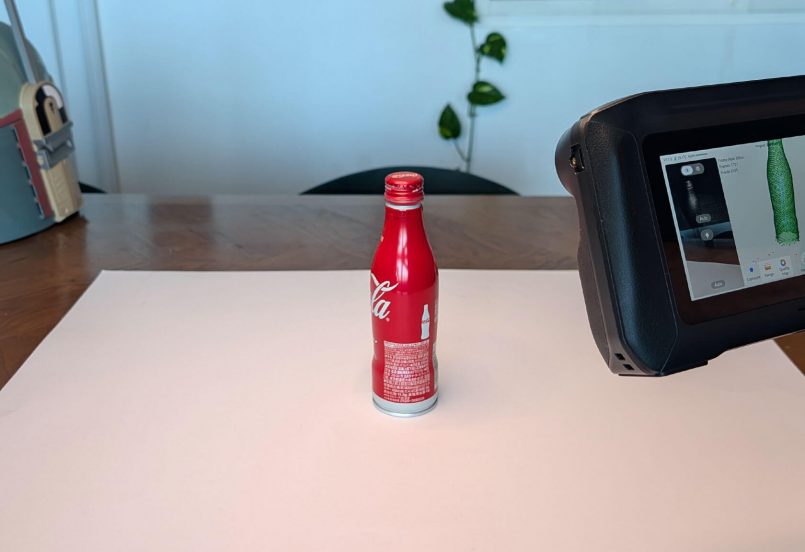
Infrared is quick to get into because there’s not much preparation involved. You choose your settings, point the P1 at the object and start moving around it while watching the model gradually appear on screen. The interface gives you feedback as you move, so it doesn’t take long to get a feel for the right distance and pace.
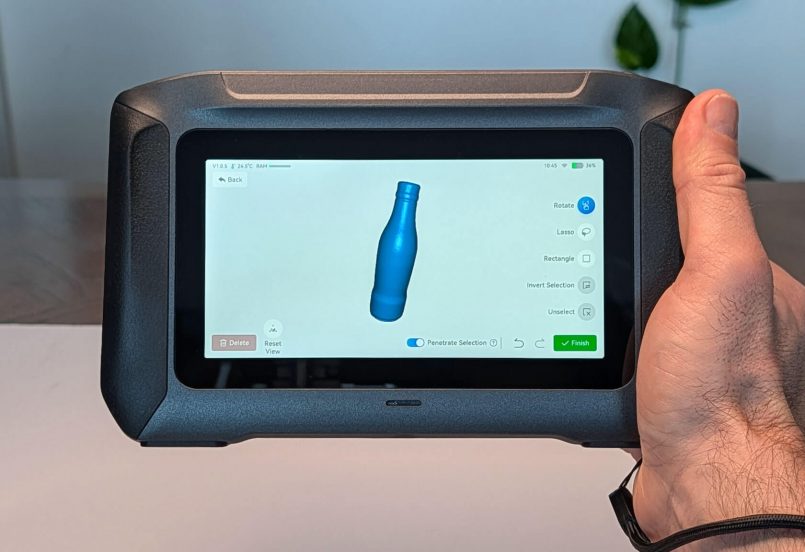
Another advantage of infrared is full-color texture capture. The P1 records RGB information alongside the geometry, allowing those textures and colors to be mapped onto the final model.
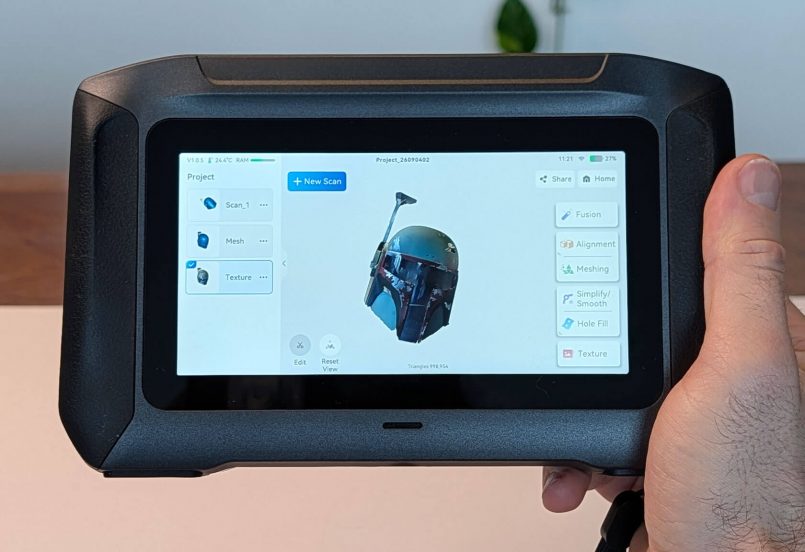
My next infrared test was considerably larger, a full-size Boba Fett helmet. I scanned this entirely in standalone mode (again without markers) and the P1 did a great job of reconstructing the overall shape while preserving many of the smaller surface details.
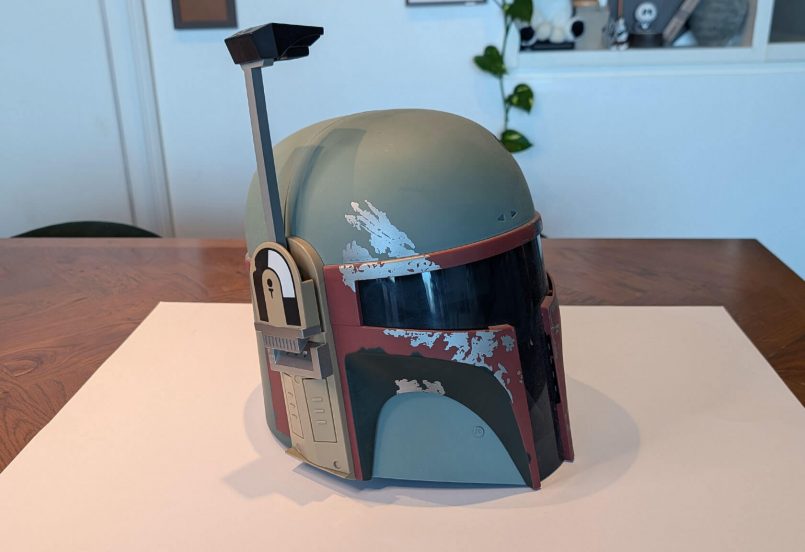
This was also where the standalone design started to make sense. Being able to simply pick up the scanner and move around a large object without dragging a laptop and cable along with you makes the entire process a lot more flexible and enjoyable.
Crossed vs Parallel Blue Laser
With a successful infrared helmet scan under my belt, I used the same Boba Fett helmet to start exploring the blue laser modes. This time I placed reflective markers around the helmet and connected the P1 to my MacBook Pro. I first scanned it using the 22 crossed laser lines, then repeated the process using the seven parallel lines.
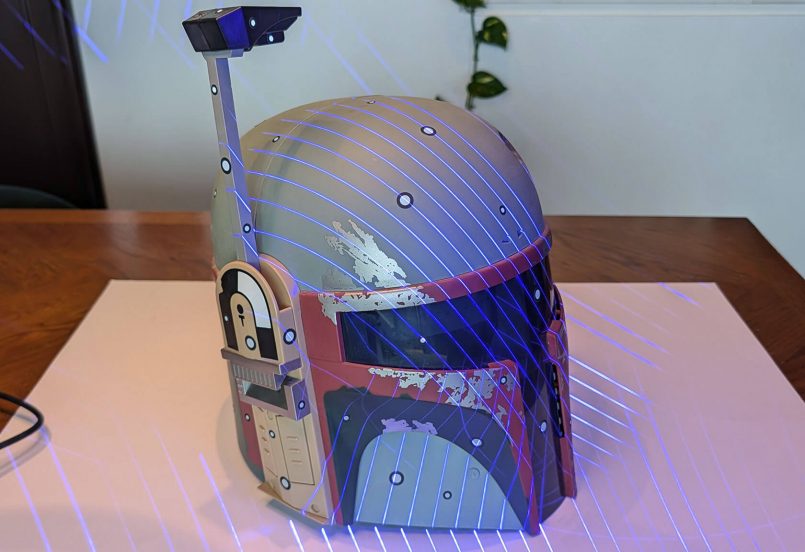
The difference in performance when connected to a powerful computer was immediately obvious. During my blue laser testing I was regularly seeing frame rates around 90 fps or higher. Crossed lines are the faster option and work particularly well when you want to establish the overall geometry of an object quickly. Parallel lines move more slowly across the surface, but capture finer detail.
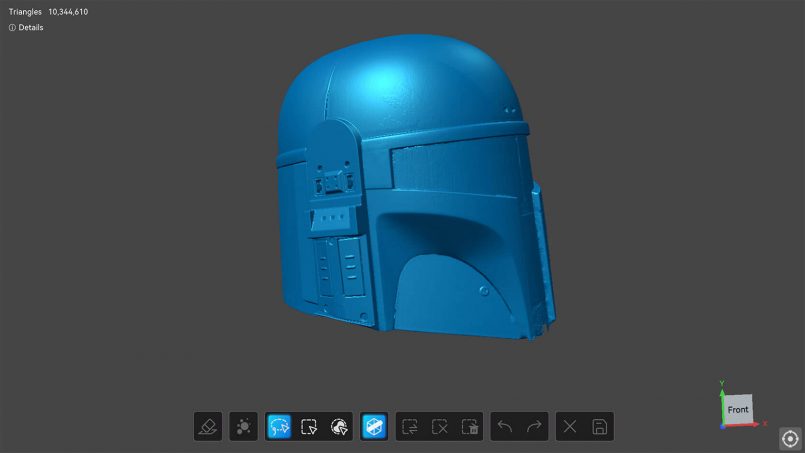
There’s a little more preparation involved here because of the markers, and patience becomes much more important. Moving too quickly or losing tracking can leave you retracing areas, so I found the best approach was to slow down and try to complete the scan in one controlled pass.
My first blue laser helmet scan was admittedly a little sloppy. The next one was better. By the third or fourth object, scanning started feeling more natural, which is probably one of the most important things I can share as a first-time user. There is a learning curve, but it isn’t a particularly steep one.
Guitar Pedal
From there, I moved on to something smaller, a vintage-looking guitar pedal. This was an interesting challenge because the pedal combines a mostly flat enclosure with rounded corners, multiple protruding knobs, a footswitch, a metallic logo and small printed graphics.
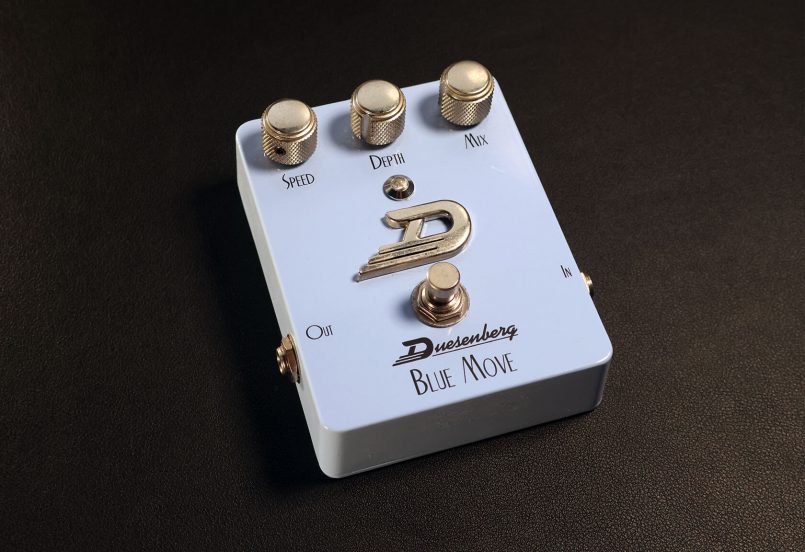
The P1 did a really good job overall. It missed the tiny power indicator light positioned above the “D” symbol, but the final model was detailed enough to reproduce even some of the printed labels across the front of the pedal.
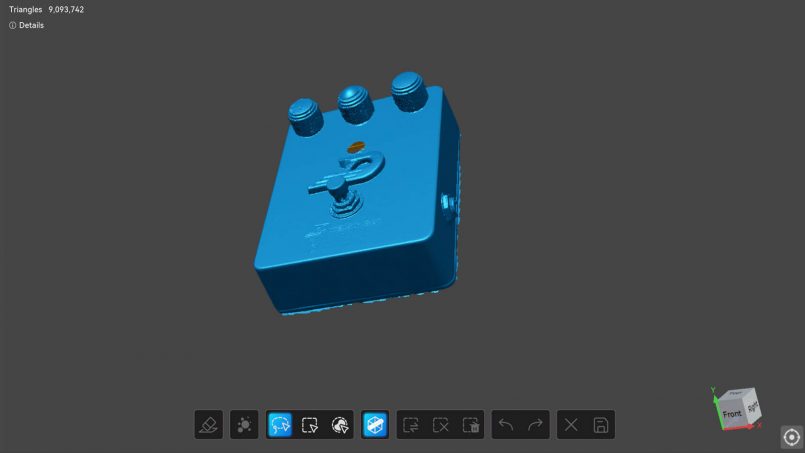
Another quirk showed up around the middle knob. I had placed a larger reflective marker in the center of that knob, while using smaller markers on the other two. For whatever reason, that part of the scan came out noticeably bumpier and more convex than the real thing, rather than preserving the flatter shape of the knob. Given my lack of experience, there’s a good chance this came down to my marker placement or scanning technique rather than any limitation of the P1 itself.
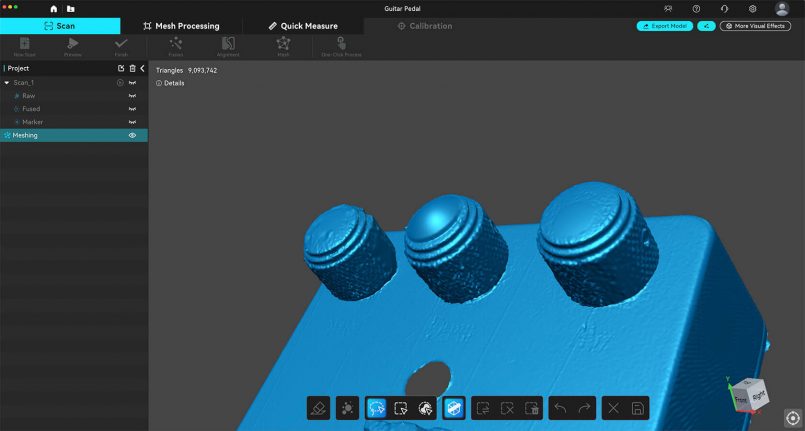
That’s something worth keeping in mind. High accuracy doesn’t mean every tiny physical feature will automatically translate perfectly into a finished model. Your scanning angle, lighting, marker placement, exposure and the geometry of the object itself can all influence what gets captured.
Breaking Bad Barrel
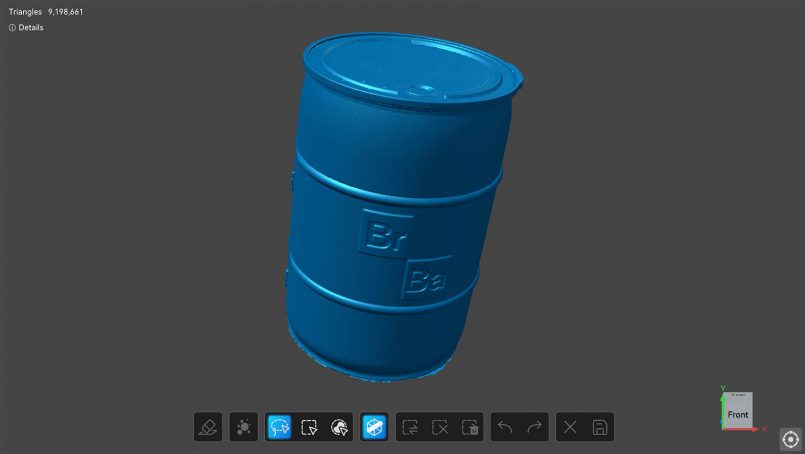
Next up was something larger again, my barrel-shaped Breaking Bad Blu-ray set. The mostly black finish made this a more challenging test. Dark surfaces can cause problems for optical scanners, but Creality specifically says the P1 is able to capture black and metallic materials without requiring scanning spray.
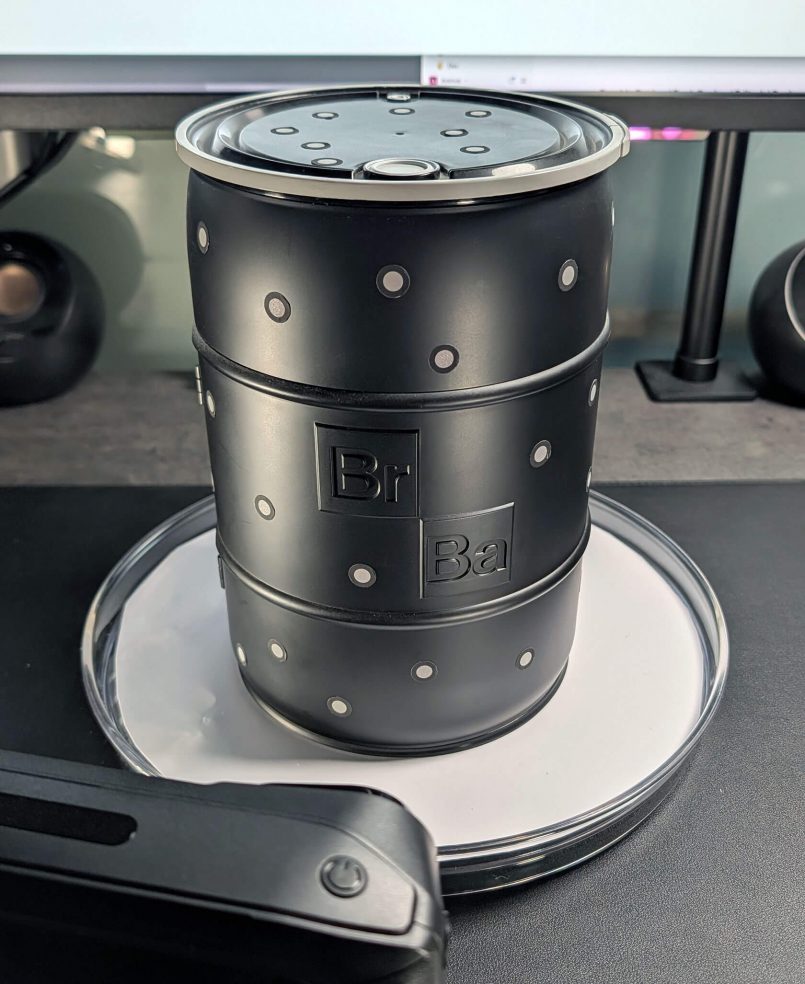
I did need to adjust the exposure to get the P1 tracking the barrel properly, but once I had the settings dialed in, parallel line mode produced an excellent result. The scanner captured the cylindrical shape cleanly, along with the raised Br/Ba lettering on the front and other smaller surface details.
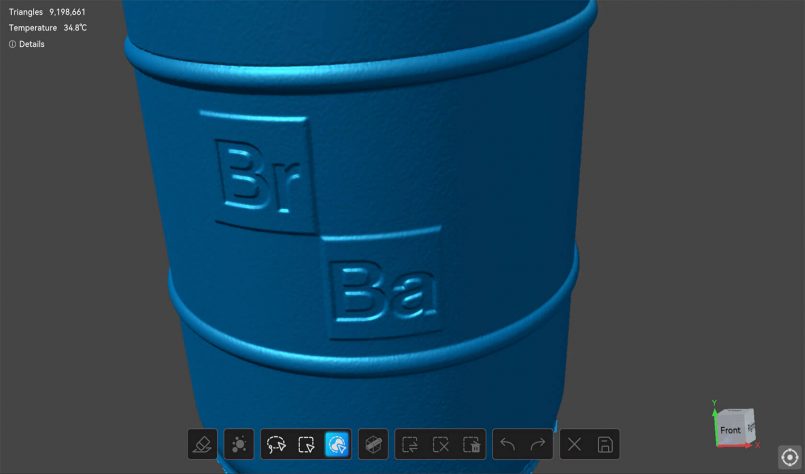
This was probably one of my favorite scans because it showed how much difference a small settings adjustment can make. If the P1 isn’t immediately picking something up, it doesn’t necessarily mean the object can’t be scanned. Sometimes it just needs a little tweaking.
Going Small With Hollow Knight
After the barrel, I went in the opposite direction with a small Hollow Knight figurine that is around 2.7 inches (6.9 cm) tall. I used parallel line mode again here, and watching the protagonist of one of my favorite games slowly materialize on the screen put a smile on my face.
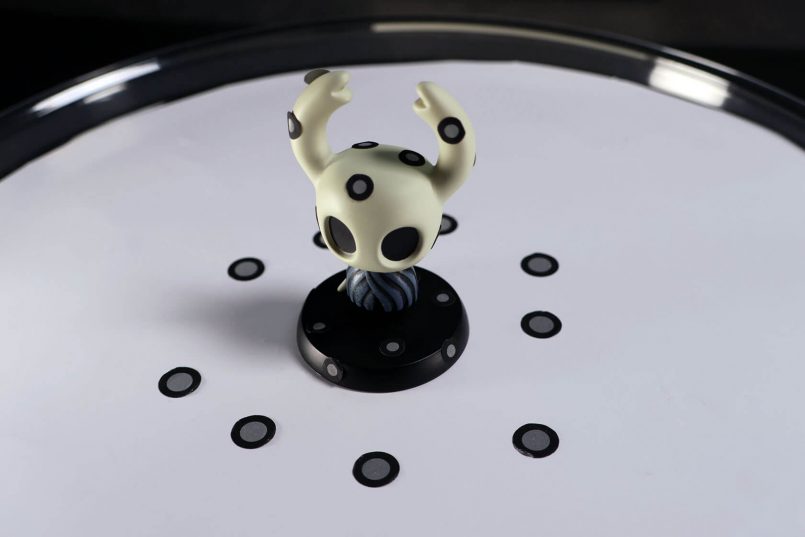
This test also gave the P1 another very different type of geometry to deal with. Instead of large flat or curved surfaces, the figurine has smaller contours, narrow limbs and sculpted details. The parallel lines took longer, but the added precision made sense for an object like this.
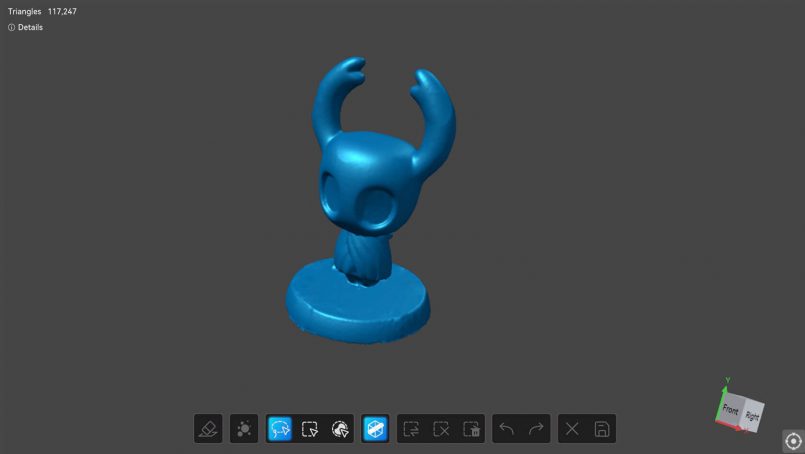
That’s ultimately how I ended up thinking about the P1’s different modes. You don’t need to understand all the underlying tech to get started. Infrared is great when you want something quick and marker-free. Crossed lines help cover ground quickly. Parallel lines are where I’d turn when detail matters more than speed.
CrealityScan Software
Capturing the object is only half of the workflow, but fortunately the next steps aren’t that intimidating either. CrealityScan runs both on the P1 itself and as a desktop app for Windows and macOS, and for the most part it’s intuitive and easy to find your way around.
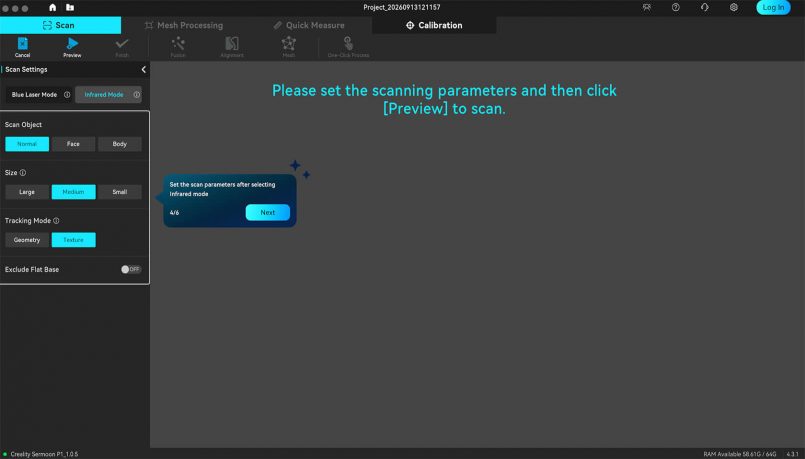
Once your point cloud has been fused and converted into a mesh, you can remove unwanted parts, smooth uneven areas and automatically fill small holes. You can leave a lot of this to the software, or manually select specific areas you want to clean up. Creality also includes a one-click process on desktop for more straightforward scans, while the individual processing stages give you more control when dealing with complicated pieces. More complex projects can also combine and align multiple scans, giving experienced users much more flexibility than I needed for my initial tests.
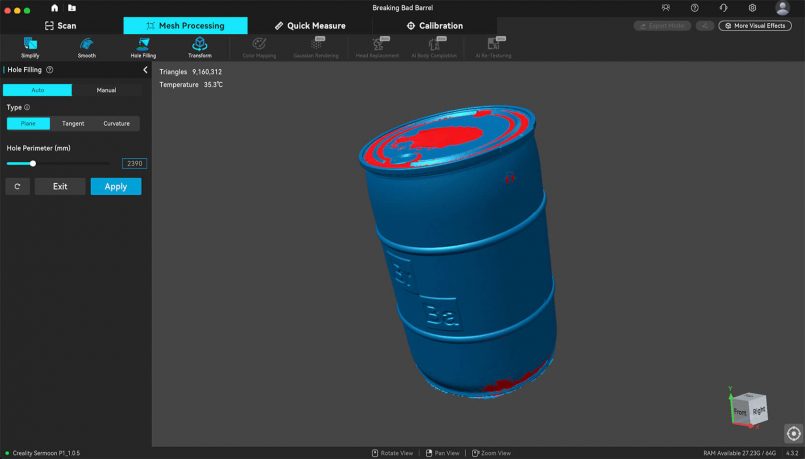
While using the app, one thing tripped me up, and it’s worth mentioning exactly because I’m not a 3D pro. The lasso select tool works in a very particular way that takes some getting used to. I’m a regular Photoshop user, so I expected the lasso to behave the way it does there, the “normal” way for me, and it doesn’t. Maybe this is standard behavior for people who use 3D scanning software regularly, but I’d love to have the option to adjust the tool’s behavior or use alternatives like polygonal and magnetic lasso tools. Once you understand how it works though, it’s certainly usable, and to Creality’s credit there’s also a handy quick-select option for connected components that makes it easier to isolate and remove separate pieces of unwanted geometry.
All the operations I mentioned can be done directly on the scanner, which is impressive in its own right. But for more careful cleanup, I much preferred using the larger display and mouse controls on my MacBook Pro.
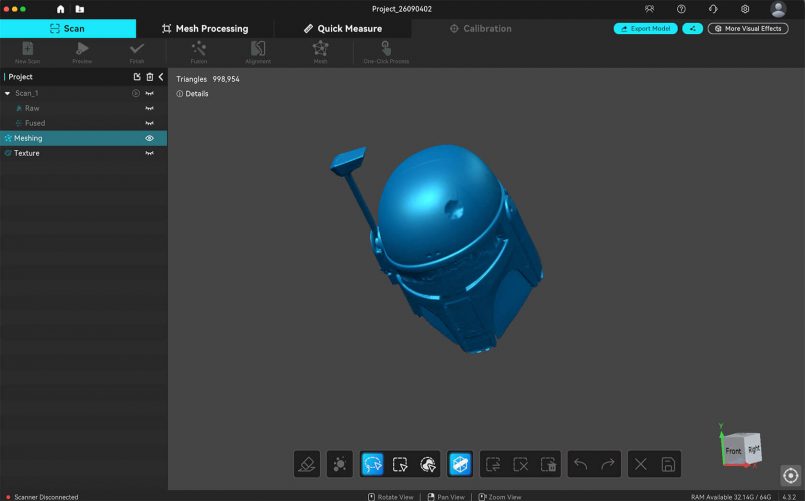
Once you’re done, finished scans can be exported into common formats for use in 3D printing, modeling and reverse-engineering workflows. CrealityScan supports a range of formats including ASC, OBJ, PLY, 3MF and STL.
Battery Life
Battery life is roughly what I’d expect from such a powerful device squeezed into a portable package. With heavy standalone use, I generally got somewhere between one and one and a half hours from a battery. That isn’t a lot, but Creality includes a spare 3,300 mAh battery in the box to help avoid disrupting workflows.
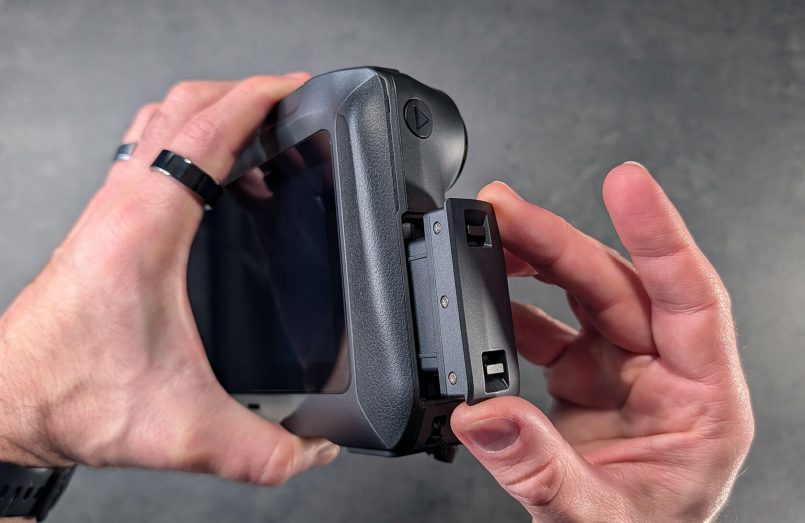
Each battery has its own USB-C port, so you can charge one independently while the other stays inside the scanner. Swapping them only takes a few seconds, but the release triggers are a bit stiff and fiddly. It’s a minor annoyance when you think about the convenience of hot-swapping, but it’s there.
Creality says the included 65W charger can take a battery to 80 percent in roughly 50 minutes. In my testing, a full charge to 100 percent took just over an hour.
This two-battery system makes far more sense to me than installing a larger internal battery. It keeps the scanner portable while allowing you to extend a scanning session with a quick swap.
Pros & Cons
Pros
- Excellent scan quality, especially in tethered mode
- Beginner-friendly onboarding, with a narrated tutorial and guided calibration that assume no prior knowledge
- Truly capable and portable standalone operation
- Strong performance over a wired Mac connection
- Built-in 6-inch (15.2 cm) touchscreen displays scans in real-time
- Multiple scanning modes cover very different objects and use cases
- Handles dark surfaces impressively once exposure is dialed in
- CrealityScan software is easy-to-use and intuitive
- Spare battery and high-quality protective case included
Cons
- Very expensive for hobbyists
- 1.8 lb (830 g) weight can become noticeable during longer scans
- Lasso selection tool takes some getting used to
- Small physical details can still be missed
- Battery release triggers are stiff and a bit fiddly
Verdict
The Creality Sermoon P1 isn’t a casual gadget. With pricing around $3,000, this is clearly aimed at people who have a serious reason to turn physical objects into accurate digital models.
But what surprised me is how approachable it really is. As someone who had never touched a 3D scanner before, I was getting usable, impressive results within my first couple of scans, and getting better each time. If you’re a committed beginner who can justify the spend, this is absolutely a device you can learn on.
There’s certainly technique involved, and no doubt a pro could get much better results than I did. Marker placement matters, exposure matters, and learning how slowly and thoroughly to move around an object makes a big difference. But I felt like the P1 did an excellent job of guiding me through that learning curve rather than making me fight against it.
The all-in-one standalone design is a fantastic concept. Being able to grab the scanner, walk over to an object and complete the entire workflow without a computer makes the device feel incredibly flexible. Connect it to a capable PC or Mac, and the P1 becomes faster and even more impressive.
For a beginner, the biggest hurdle isn’t usability. It’s the price. But for professionals, creators and businesses that need a highly portable scanner capable of tackling everything from small detailed components to much larger objects, the Sermoon P1 combines serious capability with one of the most approachable workflows I’ve seen in a piece of specialist hardware. It is definitely not a casual purchase, but for the right person, it’s an easy recommendation.
Can the Sermoon P1 work without a computer?
Yes. You can scan, process, edit and export models entirely on the device. Connecting it to a computer improves performance and makes detailed cleanup easier, but it isn’t required.
Is the Sermoon P1 good for beginners?
Surprisingly, yes. A built-in narrated tutorial and guided calibration walk you through the basics, and a complete newcomer can get good results quickly. The blue-laser modes have a short learning curve, but infrared is beginner-friendly from the first scan.
Do you need to place reflective markers on objects?
It depends on the mode. Infrared (NIR) mode scans without markers, which makes it the easiest starting point. The blue-laser modes use reflective markers, which are included in the box.
What can you scan with it?
Quite a lot. During my testing I successfully scanned objects ranging from a small Hollow Knight figurine and guitar pedal to a full-size Boba Fett helmet and large barrel-shaped Blu-ray collector’s set. Creality offers different infrared and blue laser modes depending on whether you prioritize markerless capture, speed, detail or recessed geometry.
What formats can CrealityScan export?
CrealityScan supports ASC, OBJ, PLY, 3MF and STL files, giving you plenty of flexibility for further editing, reverse engineering or 3D printing.
How long does the battery last?
Roughly one to one-and-a-half hours of standalone use per battery under heavy load. A spare is included, batteries are hot-swappable, and charging to 80% takes roughly 50 minutes.
This post contains affiliate links to partner brands. We earn a small commission if you click the link and make a purchase. There is no extra cost to you, so it’s just a nice way to help support the site. The product featured in this article was provided by the manufacturer for testing purposes. No payment was received for this feature, and the opinions expressed are entirely our own. All images © Inspiration Grid unless otherwise credited.








More
articles
Inspiration
in your inbox
Amazing art & design, never any spam.
We care about protecting your data. Please refer to our Privacy Policy for more.

- Advertising
- Architecture
- Art
- Branding
- Fashion & Beauty
- Gaming
- Graphic Design
- Illustration
- Industrial Design
- Interior Design
- Logo Design
- Packaging Design
- Photography
- Pop Culture
- Print Design
- Product Design
- Technology
- Typography
- UX & UI Design
- Vehicle Design
- Video & Motion
© 2026 Inspiration Grid, all rights reserved. Some of our posts may contain affiliate links to partner brands. We earn a small commission if you click the link and make a purchase. There is no extra cost to you, so it’s just a nice way to help support the site. All images, videos, and other content posted on the site is attributed to their creators and original sources. If you see something wrong here or you would like to have it removed, please contact us.