

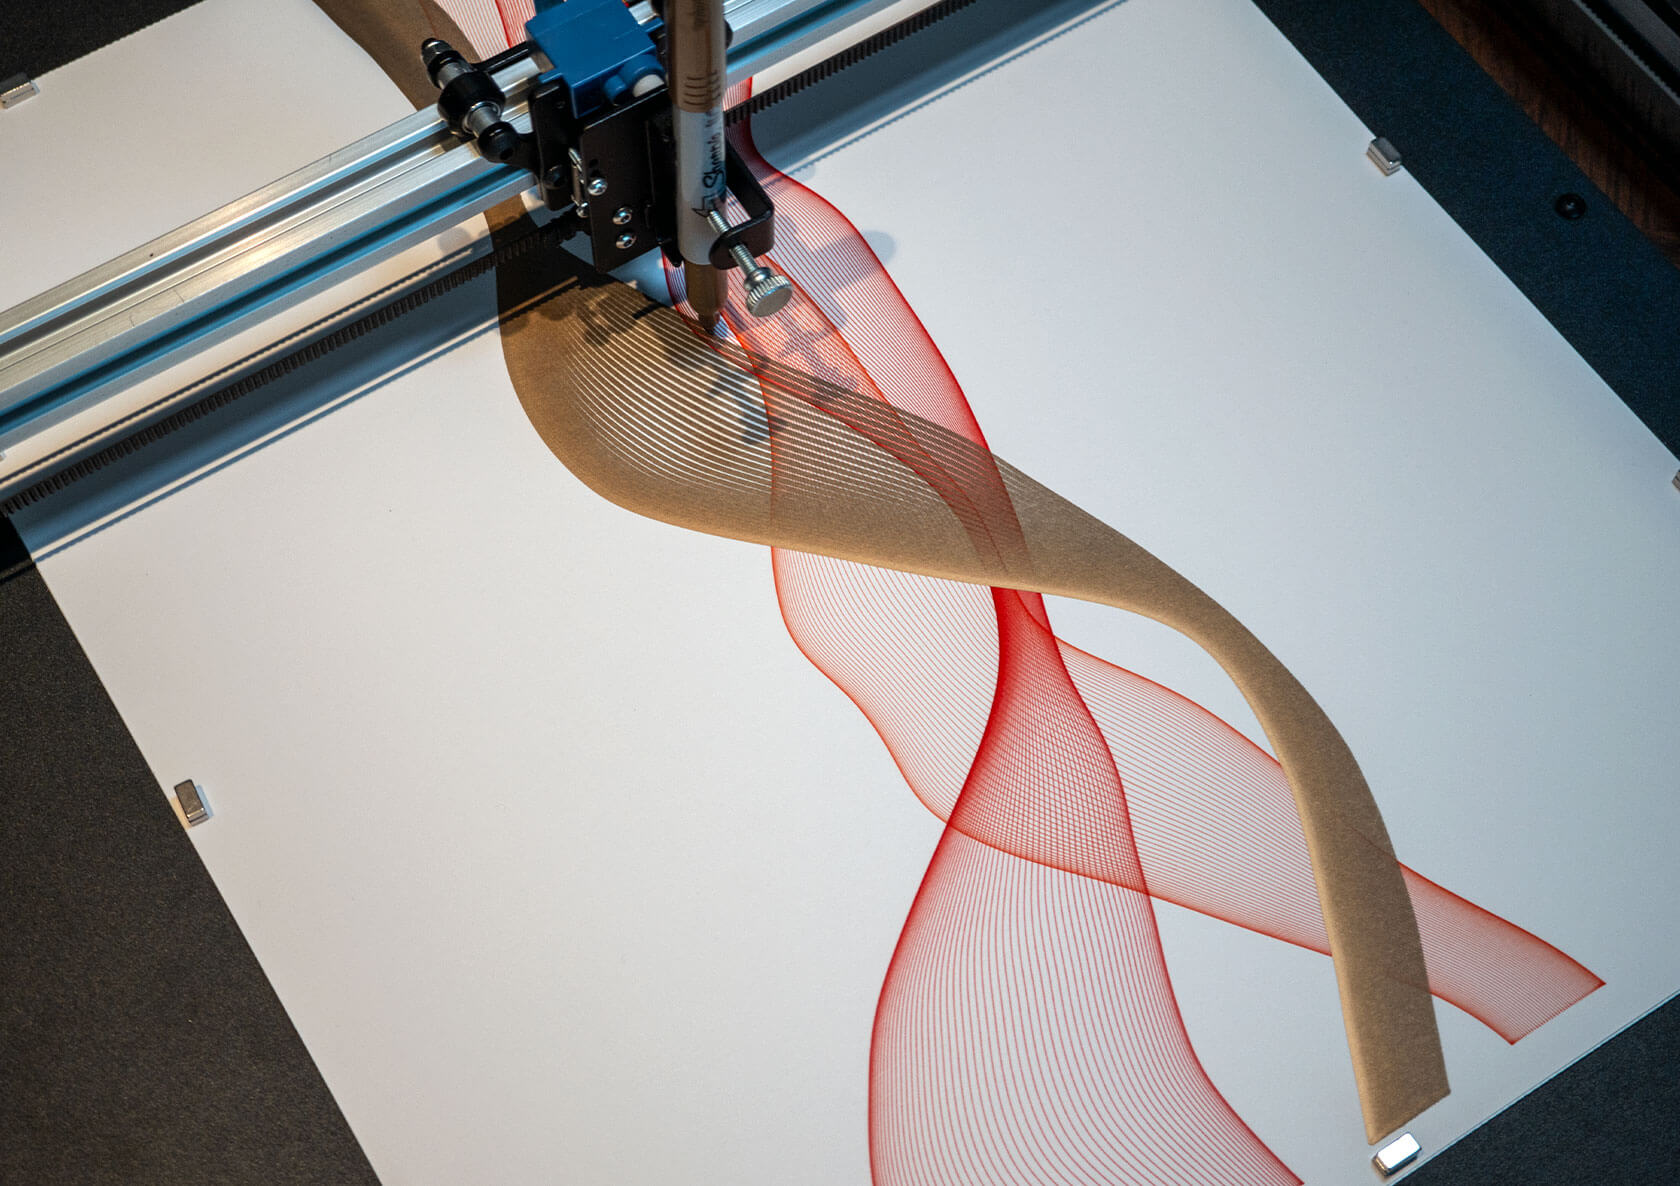
UUNA TEK ArtStation 1824 Review: Falling Down the Generative Art Rabbit Hole
Published Sep 27, 2026
Includes affiliate content
My first proper dive into generative art turned into weeks of code, pens, paper and one very addictive pen plotter.
I’m a designer, not a coder or engineer, so generative art had always sounded fascinating to me, but also a bit intimidating. I loved the idea of creating artwork through code and turning mathematical systems into something physical, but I’d never really known where to start.
Then UUNA TEK offered to send me their new ArtStation 1824, a large-format pen plotter designed to turn digital artwork into physical drawings.
A few weeks and a growing pile of plotted experiments later, I can safely say this has been one of the most enjoyable pieces of creative tech I’ve tested in a long time. The ArtStation itself is impressively precise and very easy to use. Getting there wasn’t completely frictionless though, particularly when it came to the documentation and figuring out a completely new creative workflow.
What’s in the Box
The ArtStation came in a large, fairly unassuming cardboard box with the machine already mostly assembled. Inside you’ll find the plotter itself, a power adapter, Micro-USB to USB-C cable, paper magnets, cable ties, tools, replacement parts, a quick start guide, and a thank you note.
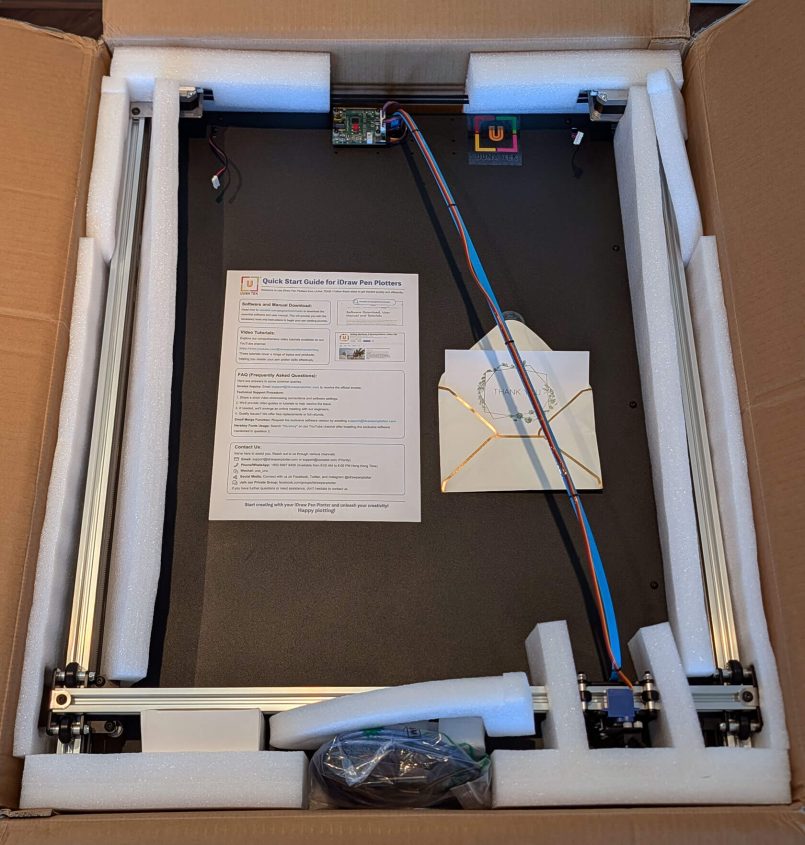
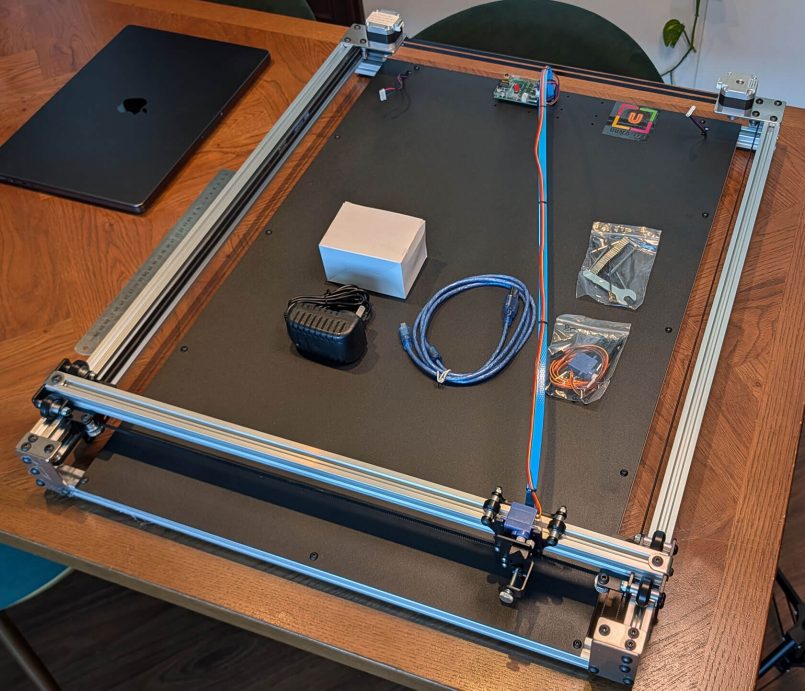
Getting the machine ready couldn’t have been much easier. I only had to connect the two motor cables, power and USB before the machine was essentially good to go. The whole process took less than five minutes.


Ironically, I spent a lot more time figuring out which documentation I was supposed to follow.
The included quick start guide points to a Google Drive folder with various documents for UUNA TEK’s other plotters, including the iDraw 1.0, 2.0 and H SE. At the time of testing, I couldn’t find a dedicated manual for the ArtStation 1824, so I eventually worked out that the H SE documentation was the closest match.
UUNA TEK explained that the 1824 is based on the H SE architecture and told me they’re preparing dedicated documentation for the new model. That’s good to hear, but considering the ArtStation 1824 is already on sale, I think those instructions should have been ready from day one. For a machine at this price, buyers shouldn’t have to figure out which competing set of instructions applies to their new hardware.
Specs & Pricing
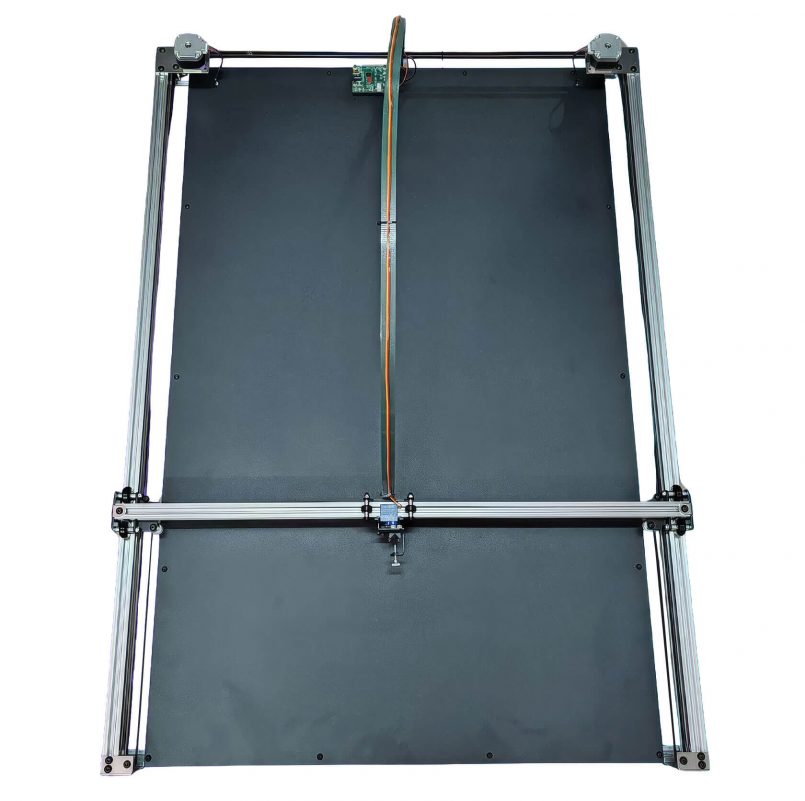
The ArtStation 1824 is currently priced at $1,799 USD, with the model name referring to its large 18 x 24-inch (457 x 610 mm) working area. UUNA TEK uses a CoreXY motion system and lists a maximum XY travel speed of 11 in/sec (280 mm/s), mechanical precision of 0.1 mm and repeatability of ±0.05 mm at low speeds.
The pen holder accommodates drawing tools up to 0.63 inches (16 mm) in diameter and can be adjusted between 45 and 90 degrees. The ArtStation can also work with materials up to 0.39 inches (10 mm) thick as standard, or up to 0.71 inches (18 mm) with a frame adjustment.
The machine connects to your computer over USB and can operate completely offline. It supports Windows, macOS and Linux, with plotting handled through UUNA TEK’s extension for Inkscape.
The ArtStation 1824 is a pretty substantial piece of equipment, measuring approximately 30.4 x 25.7 inches (773 x 653 mm) and weighing around 24.3 lbs (11 kg). The frame itself stands about 4.5 inches (115 mm) high, not including the cable guide.
Design & Build Quality
As you can probably tell from those dimensions above, this is a big machine. It looks industrial and utilitarian, more like a laser engraver than a typical desktop printer, mainly due to its open-frame construction and exposed rails.
It’s not really a sleek piece of tech designed to show off on your desk, and it doesn’t need to be. Everything here feels fit for purpose. The aluminum frame is solid and well put together, and throughout my testing the machine moved smoothly and was incredibly precise.
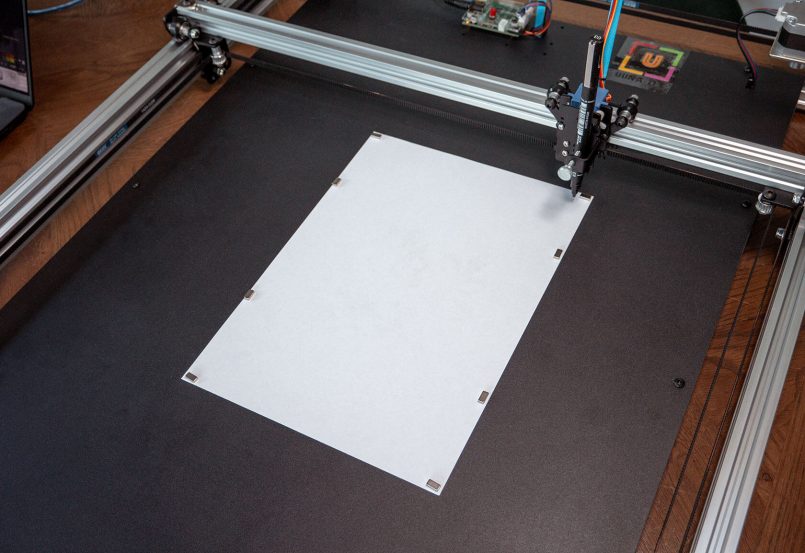
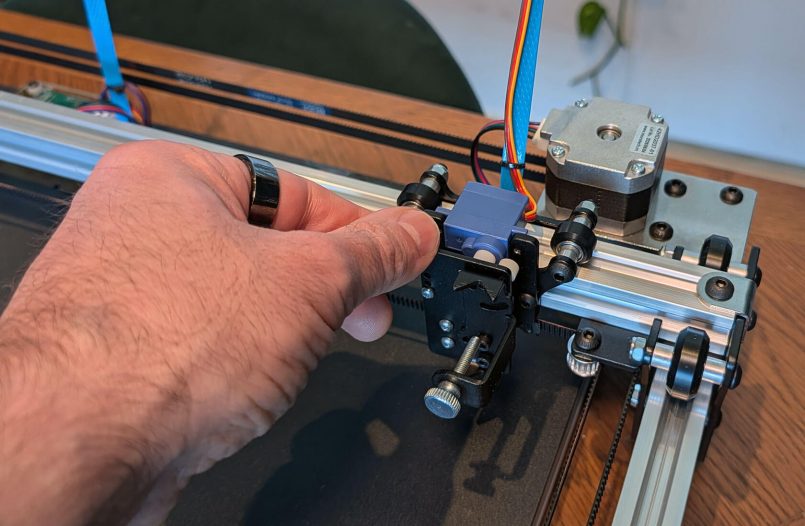
The pen holder is also straightforward. A large screw secures the drawing tool in place, and I had no trouble fitting any of the pens I tested, from regular fineliners to a much thicker POSCA marker. There’s even an angular section in the holder that happened to be a perfect fit for the triangular Artline fineliners I used for my multicolor experiments.


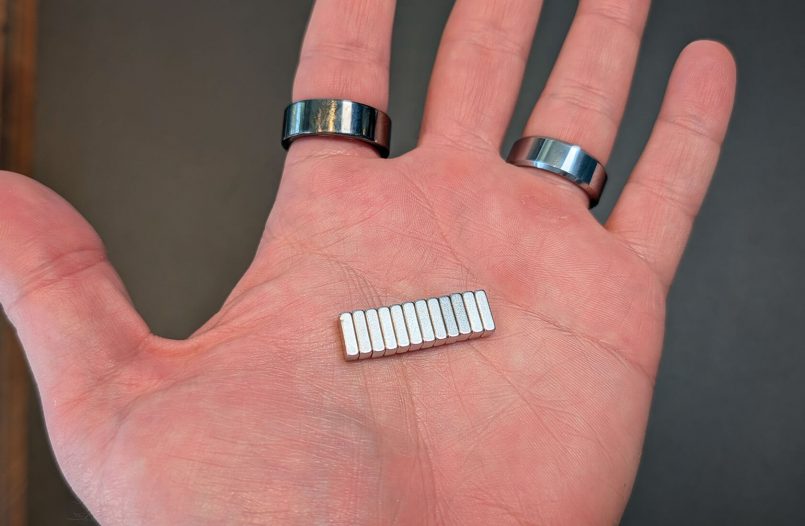
Paper is held directly against the plotting surface using the set of magnets that come in the box, which worked well with everything I tried. For thicker Bristol stock, I doubled up the small magnets just to be safe, although I never actually had any issues with the paper moving. With thinner paper, I also found that placing a few spare sheets underneath helped maintain consistent pen contact across the drawing.
The size is something you’ll definitely want to consider before buying one. At 30.4 x 25.7 inches, the ArtStation requires some serious desk space. That large footprint comes with an obvious advantage though, giving you plenty of room to produce substantial pieces.
When it comes to noise, there’s a noticeable mechanical, robotic sound while it works. At times it actually sounds a bit like a Star Wars droid (which only added to the fun for me). I wouldn’t describe it as annoying, but it’s moderately noisy and probably not something I’d want running beside me all day in a shared office.
Setup & Software
Once I figured out which documentation to follow, actually operating the ArtStation was surprisingly simple.
My workflow involved bringing finished SVG files into Inkscape and using UUNA TEK’s iDraw H SE extension to send them to the plotter. From there you can move the carriage, raise and lower the pen holder, set the plotting origin and make adjustments to the pen-up and pen-down positions before starting a job.
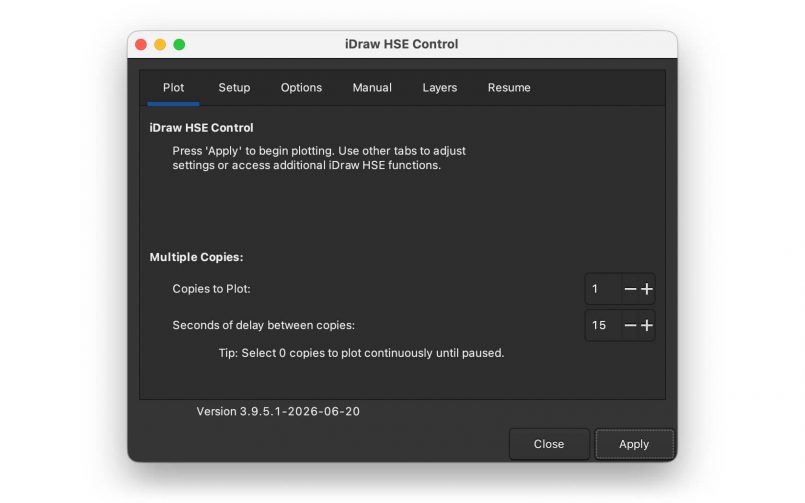
I didn’t need to change the default raised or lowered values at all during my testing. Swapping pens was generally a matter of loosening the holder, inserting the new pen, lowering it to check the position and tightening everything back up.
The extension itself worked well and wasn’t too difficult to figure out with a bit of trial and error. Inkscape is less polished and beginner-friendly, but in fairness I didn’t need to do much inside the app. Most of my artwork was already prepared as SVG files, so I was really just using Inkscape as the bridge between those files and the ArtStation.
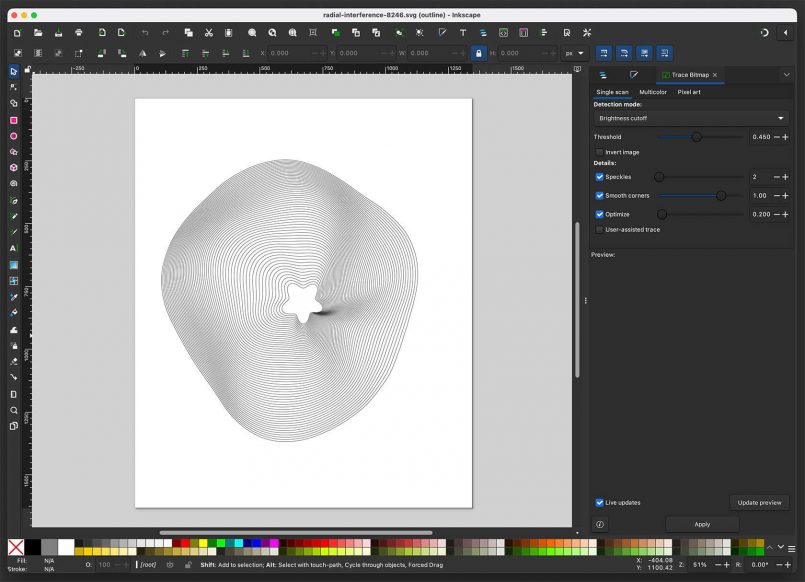
UUNA TEK currently lists Inkscape and their iDraw software as compatible options across Windows, macOS and Linux. Their ArtStation product page also directs users to the iDraw H SE tutorials as a reference, but this information is tucked away inside an accordion menu and I completely missed it. A simple mention in the printed quick start guide would have saved me some confusion, at least until the dedicated ArtStation 1824 documentation is ready.
From Code to Paper
This is where things became really interesting.
Since I had basically no experience creating generative artwork through code, I decided to approach it like any other design project: through art direction, experimentation and lots of iteration.
With that in mind, I art directed ChatGPT to help me with the coding side of things, using p5.js to generate the artwork and export everything as SVG files. There was a lot of back and forth, trial and error, and plenty of tweaking along the way.
Rather than simply asking for finished artwork, I could manipulate parameters controlling things like line density, distortion, spacing, movement and the number of points used to produce each curve. We’d generate something, I’d take a look, change the direction or fine-tune the parameters, and repeat until the composition felt right.
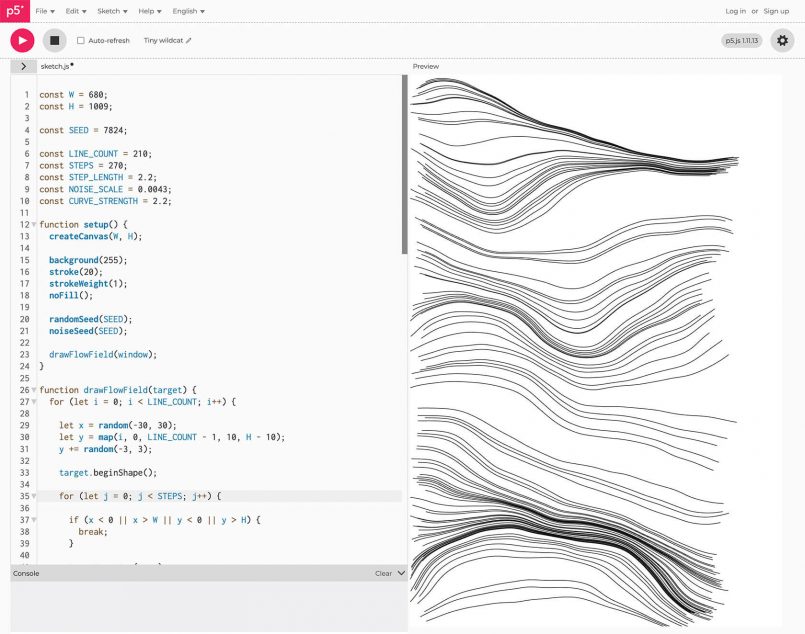
My first proper experiment was deliberately simple: a flowing field of 210 lines drawn with an ordinary 0.5 mm BIC fineliner on basic printer paper. It took around 7 minutes and 45 seconds to plot, and the result was great. The lines were crisp, consistent and extremely precise.
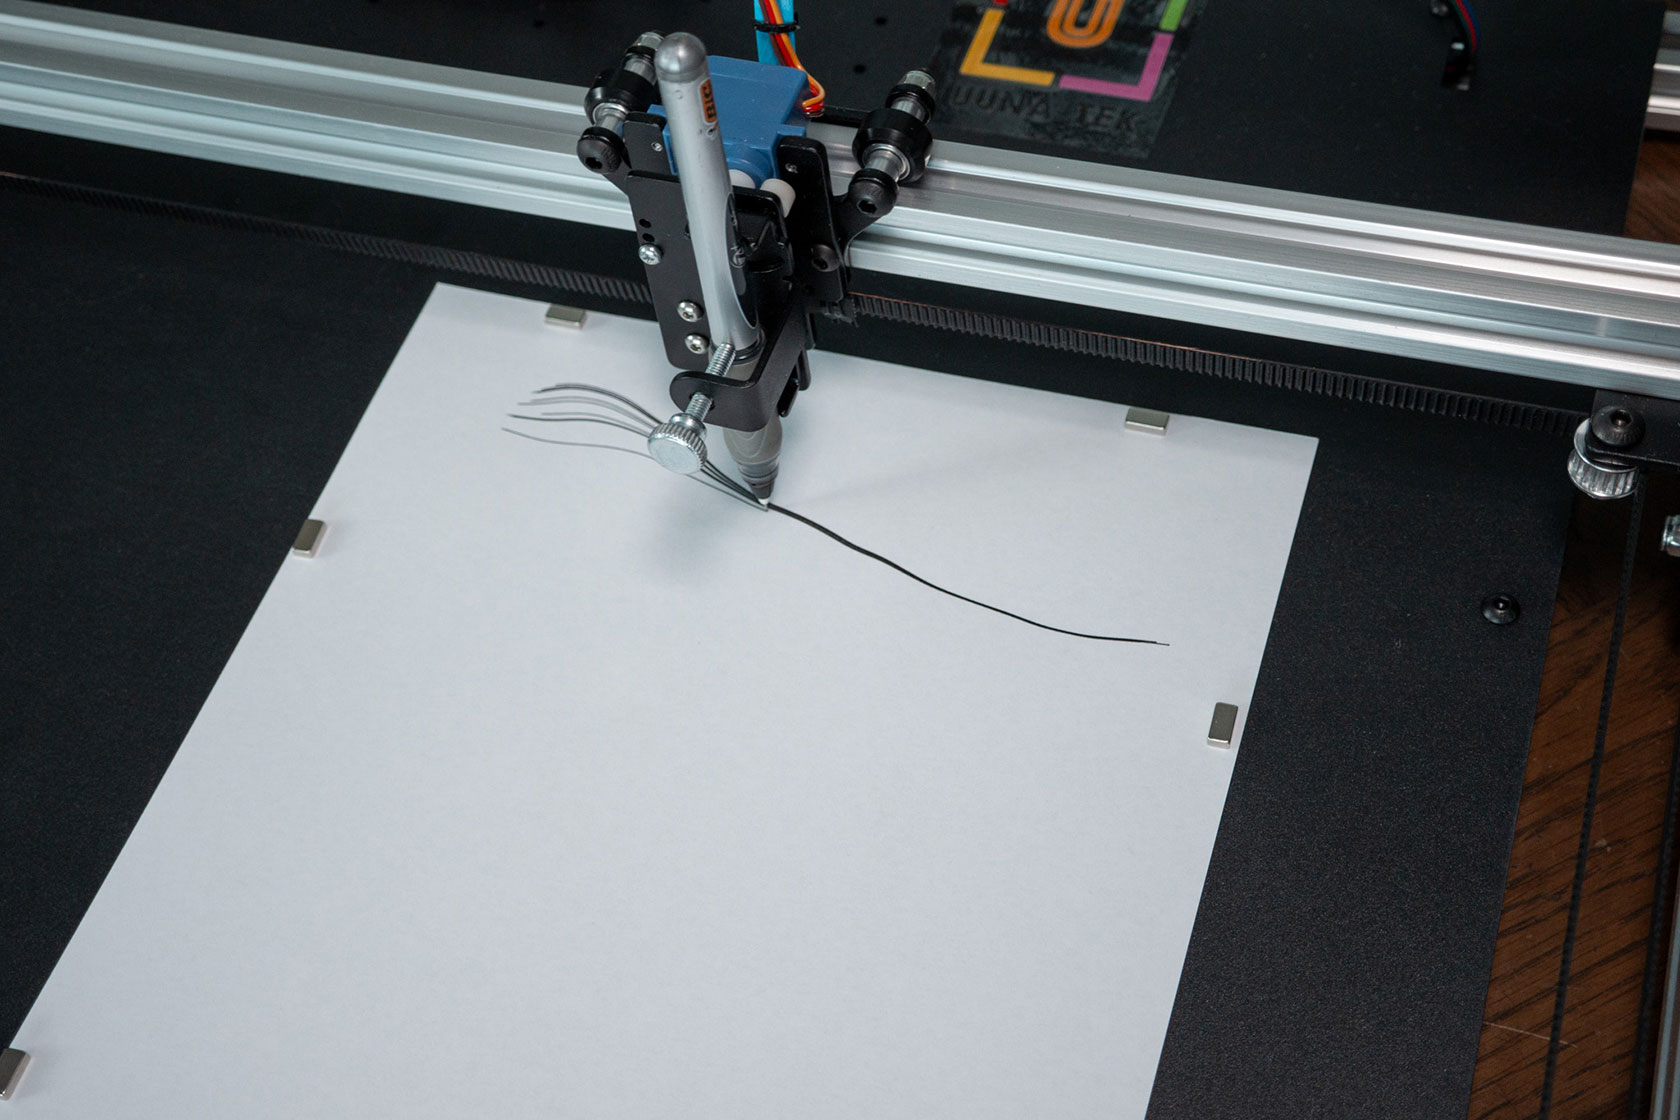
That first experiment also taught me my first practical lesson about plotting. When I noticed occasional tiny gaps in the lines, I initially wondered whether the machine was losing contact with the paper. Adding a few spare sheets underneath provided a little extra cushioning and eliminated the problem.


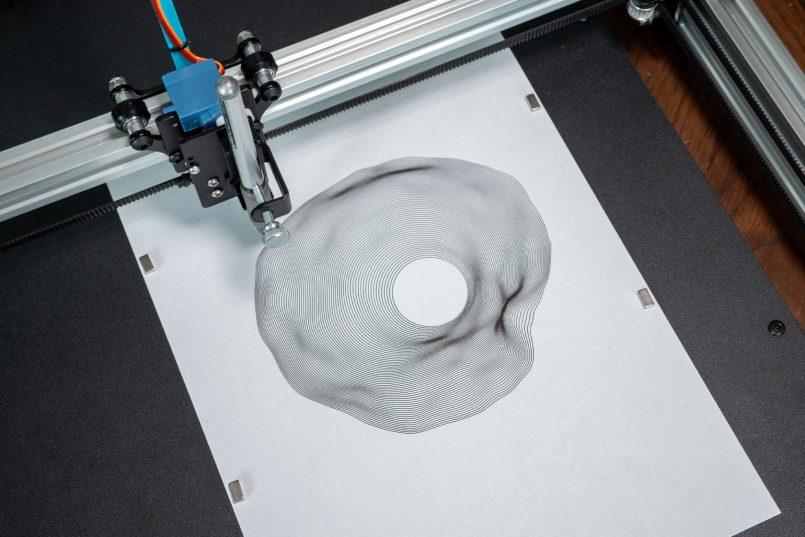
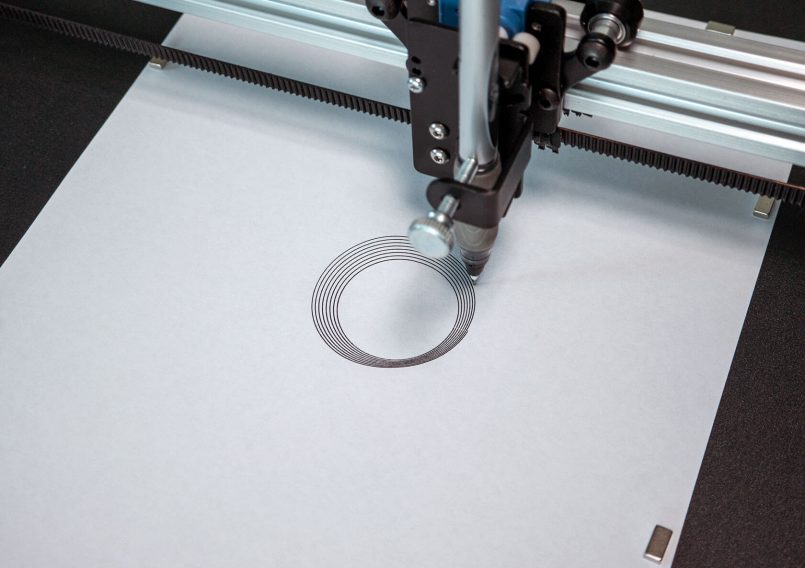
From there I moved into a set of distorted concentric contours. This piece took around 12 minutes and exposed another quirk that simply wasn’t obvious on screen.
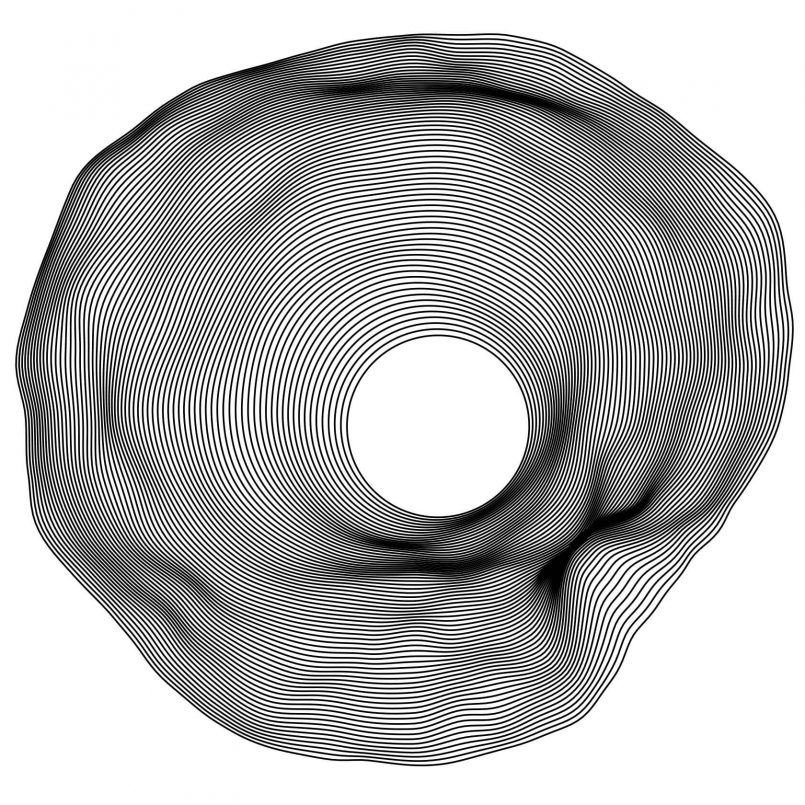
Although each loop was mathematically closed in the SVG, the physical pen-down and pen-up points could leave a tiny visible gap. Adding a slight overlap to each loop fixed it, although later experiments showed that too much overlap could create a darker seam instead.


That’s one of the things I came to enjoy about the process. The SVG is only the starting point. Once a real pen touches real paper, ink flow, paper texture, pen pressure, line overlap and even the condition of the pen itself become part of the artwork.
Pushing Things Further
Once I was comfortable with the basic workflow, I started using better materials and increasing the complexity.
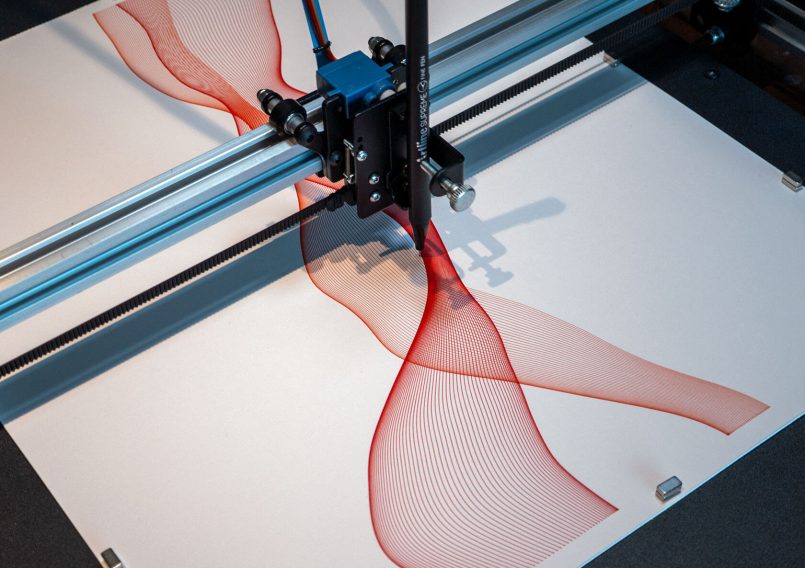
One of my larger monochrome experiments combined two mirrored generative ribbons into a large X-shaped composition, plotted using a Pigma Micron 05 and 270 gsm Bristol paper. The complete plot took roughly 30 minutes, with hundreds of individual curved lines crossing through the center.
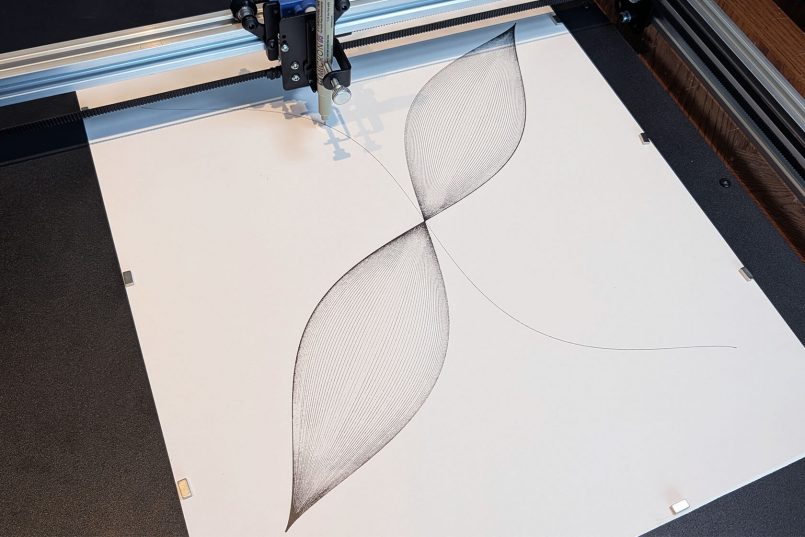
My old Pigma Micron started running out of ink during the process, creating lighter and darker areas across the piece. Obviously I can’t credit the ArtStation for my dying pen, but I actually liked the accidental character it introduced. The fading lines made parts of the artwork look more like a graphite pencil drawing while the underlying geometry stayed very precise.


Another radial piece didn’t go as planned. Some of the loops had too much programmed overlap at their start and end points, leaving visible dark seams. But the bigger problem was that the SVG clipping method I used to crop the artwork to the page boundary didn’t translate properly to the plotter. The left side stopped as expected, while paths on the right continued beyond the intended crop.
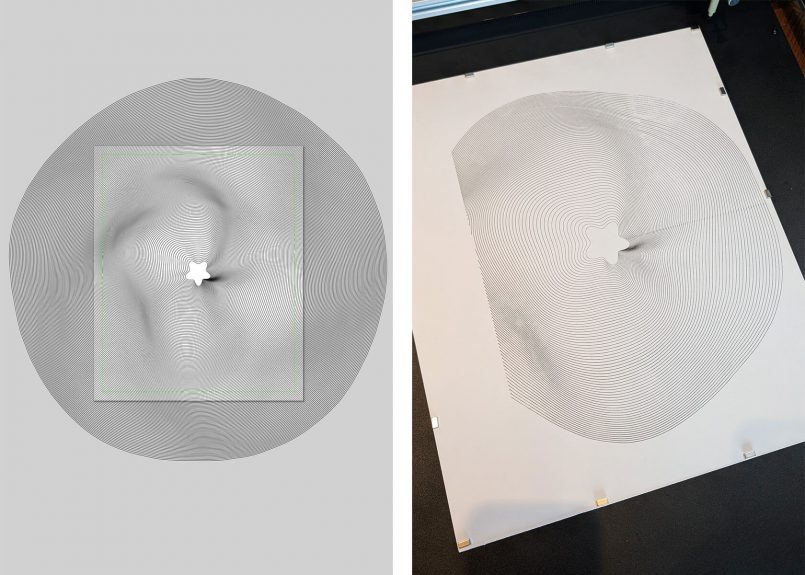
That was a useful lesson in its own right. A crop that looks correct visually inside Inkscape doesn’t necessarily mean the vector paths have actually been trimmed. For future pieces like this, I would destructively clip the geometry before plotting rather than relying on an SVG clipping mask.
None of those issues were really the ArtStation’s fault. If anything, the machine was doing exactly what I told it to do, mistakes and all.
Going Multicolor
The real highlight of my testing came when I started experimenting with multiple pens.
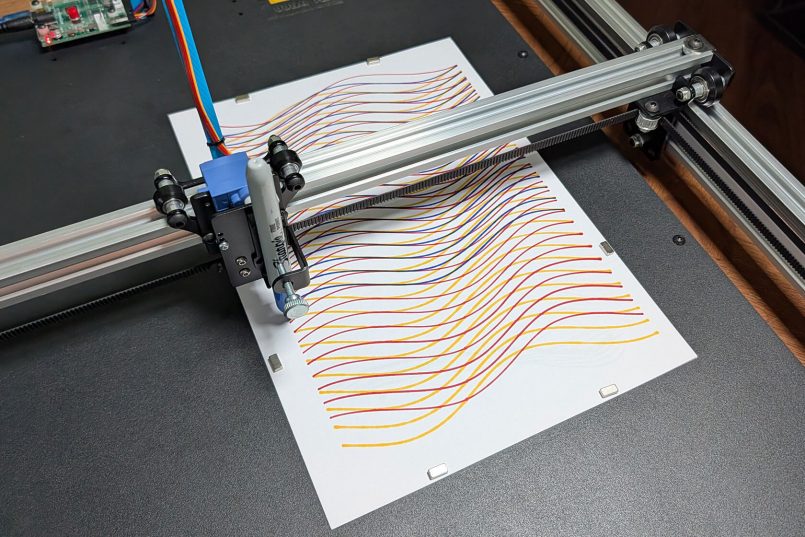
For one piece, I created three separate flowing ribbons in blue, purple and green, with each color exported as its own SVG layer. I used a sheet of Bristol paper and kept it fixed to the ArtStation with magnets while I swapped pens between passes.


The blue layer took around 14 minutes, purple took 13 minutes and 20 seconds, and green took 14 minutes and 25 seconds, putting the complete artwork at just under 42 minutes of plotting. The final result was stunning.
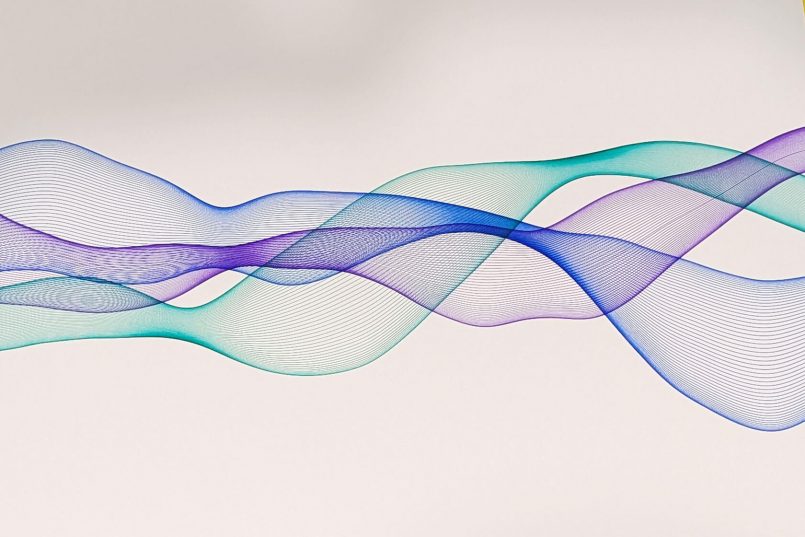
As the three sets of tightly spaced lines crossed one another, they produced moiré-like interference patterns and unexpected optical effects that weren’t nearly as apparent in the digital preview. The colors became darker and more saturated wherever the lines packed closely together, and where the ribbons crossed at different angles, entirely new rippling patterns started to appear.
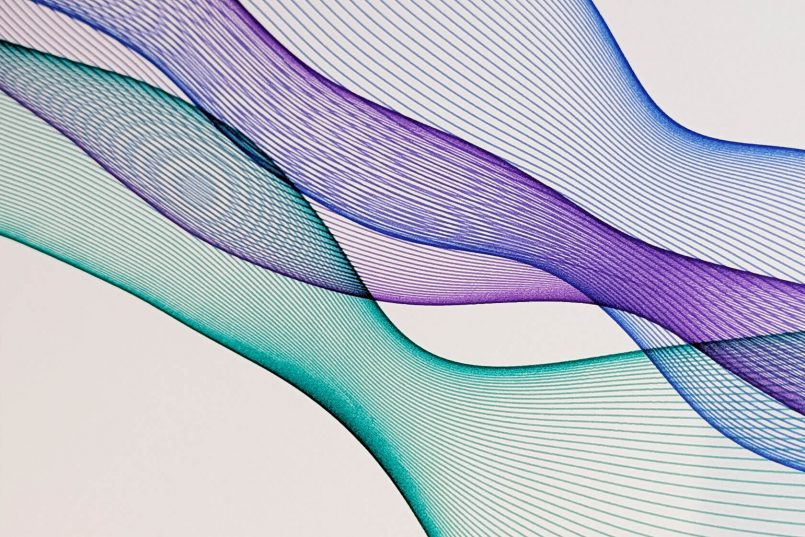
These effects might look like camera artifacts in photographs, but they’re clearly visible to the naked eye.
This was also where the ArtStation’s repeatability really started to impress me. Each color was a completely separate plotting pass with a manual pen change in between, yet the layers remained precisely positioned relative to one another.
There was one small glitch during this first multicolor piece, where part of the purple ribbon shifted slightly after my laptop went to sleep and paused the plot. I later repeated the same process with the computer kept awake throughout, and the new artwork completed without any positional issues. Based on that, it looks like the interruption was the culprit. For longer jobs, I’d simply disable auto sleep before starting a plot.
A second run quickly became another experiment of its own. This time I combined fine red and orange lines with a thicker metallic gold Sharpie. The warmer palette didn’t have quite the same colorful contrast as the original, but the different pen completely changed the character of the piece.
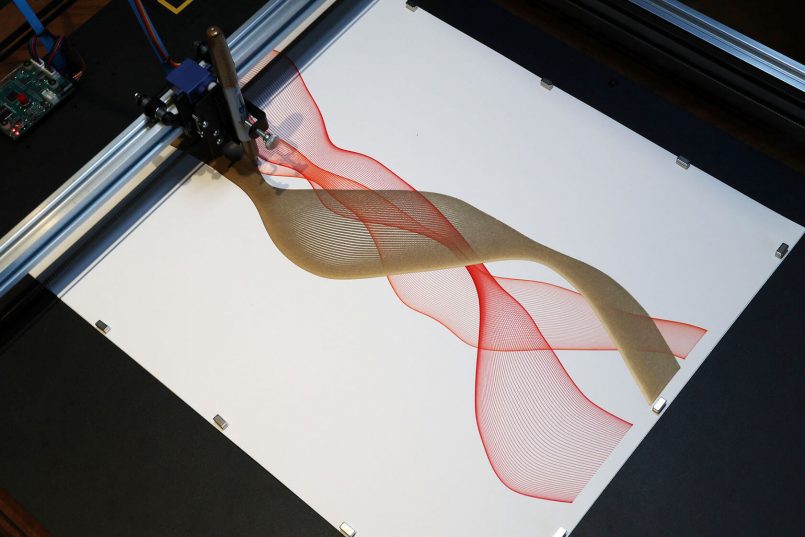
Where the gold lines converged, they visually merged into almost solid metallic areas, creating a beautiful gradient between delicate linework and denser, more opaque surfaces.


Here’s a 30-second timelapse showing all three passes coming together:
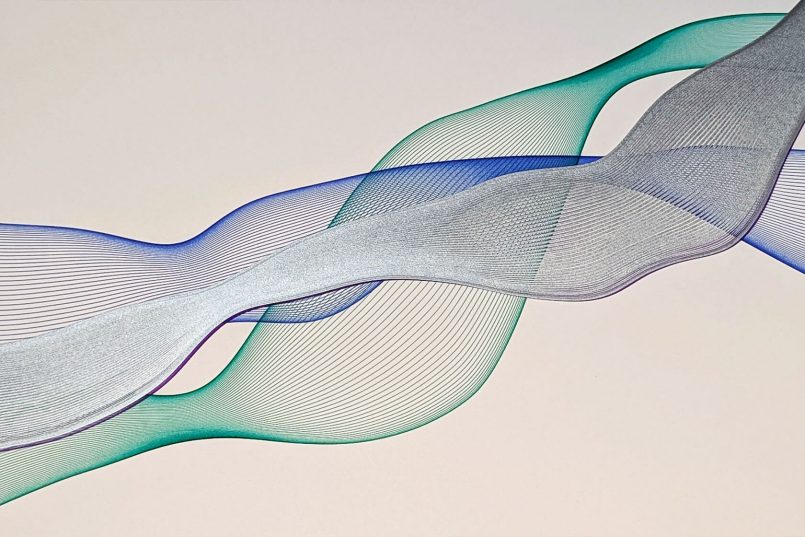
I even went back to the original blue, green and purple piece and plotted a new silver layer directly over the purple ribbon that had been affected by the interruption. Instead of simply covering the mistake, the thicker metallic ink transformed the composition, creating a prominent silver ribbon with traces of purple still visible underneath.
Different Pens, Different Surfaces
I also wanted to see how the ArtStation handled something beyond conventional fineliners and white paper.
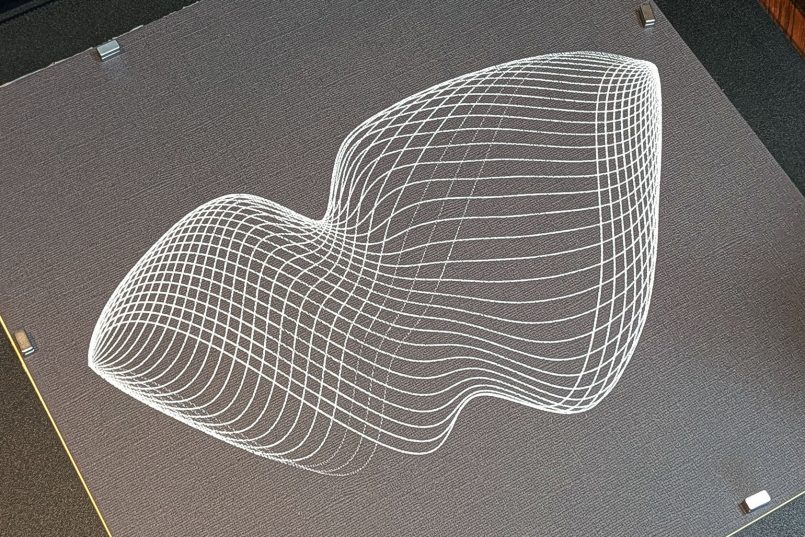
For the next experiments, I switched to a basic textured black stock and a white POSCA paint marker. The pen holder handled the thicker marker without any trouble, and the resulting white-on-black artwork was one of my favorite pieces from the entire test.
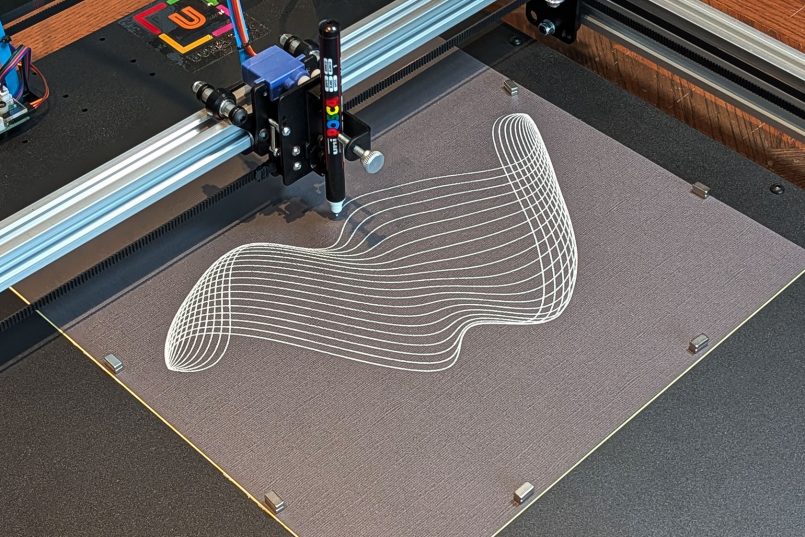
The composition was made from a series of flowing lines that twist and converge into a sculptural form. On screen it looked interesting, but plotted in opaque white ink against the textured black surface, the changes in line density gave it a much stronger sense of depth.
The POSCA began fading slightly toward the end of the run, but again, the geometry itself stayed consistent. The complete piece took just 6 minutes and 20 seconds.
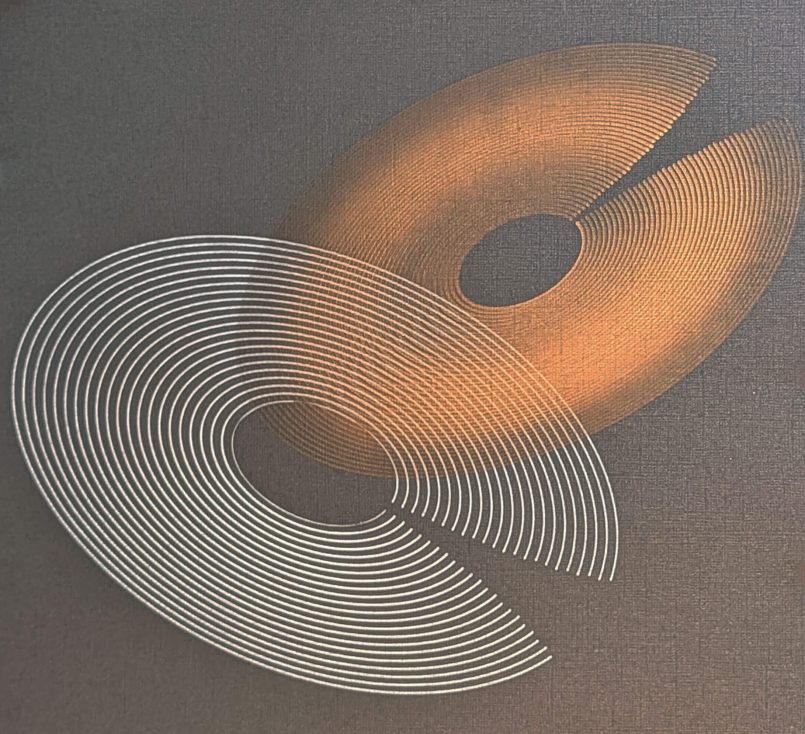
I then started combining white POSCA with a metallic gold Sharpie across separate plotting passes. One composition used two intersecting discs made from repeated elliptical lines. The white stayed bright and graphic while the gold responded to light differently, creating the impression of two objects sitting on separate planes.
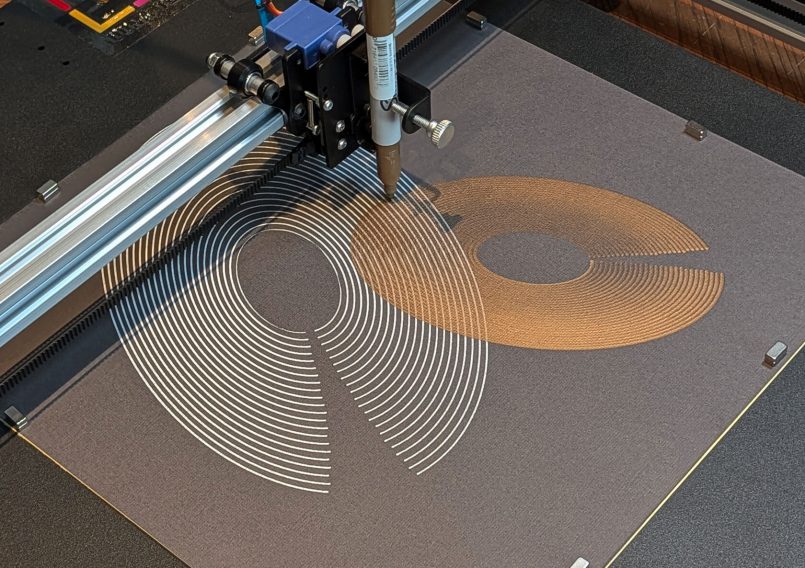
My aging gold Sharpie was starting to give up by this point, which introduced some unintended variation in the metallic coverage. Strangely enough, I didn’t hate it. The fading gave the gold disc a subtle tonal quality that added some character to the finished piece.
For another experiment, I pushed the contrast between curves and straight lines further, combining a flowing white POSCA rosette with a series of nested metallic squares that gradually rotate toward the center. Even though the second layer is made entirely from straight edges, their repetition creates the illusion of sweeping curved bands weaving through the white lines.
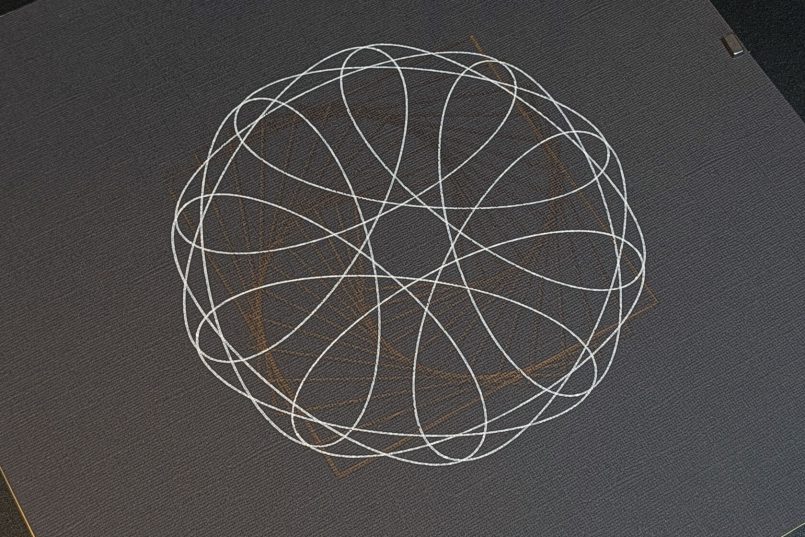
My first attempt used that old gold Sharpie that was already on its last legs, so I eventually tried the same design again with a fresh bronze marker. This time I plotted the white POSCA first and bronze second, letting the angular geometry show more prominently across the white curves. The difference was striking, and the bronze held its own beautifully against the opaque white ink and textured black stock.
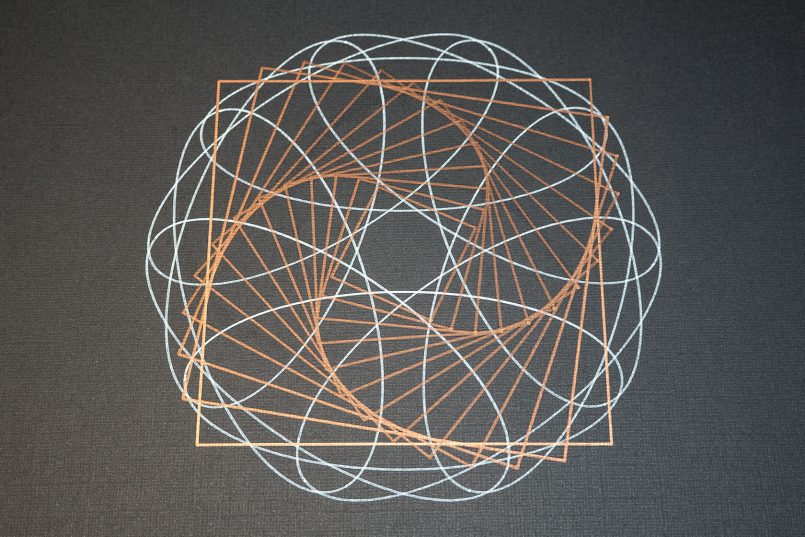
By this point, plotting had started to feel less like sending finished files to a machine and more like an iterative printmaking process. The code gave me the geometry, but the choice of pen, ink, paper, plotting order and overlapping passes all had a huge influence on the finished artwork. Some of my favorite effects weren’t things I had designed on screen at all. They only appeared once those digital lines became physical marks on paper.
Performance
After all these experiments, what impressed me most was how consistently the ArtStation just did what I asked it to do.
Fine parallel lines were always beautifully controlled. Dense intersections stayed clean. Curves were smooth, and separate color passes lined up extremely well. Even when my pens started running dry or my SVG included a mistake, the machine itself continued to deliver consistently precise results.
UUNA TEK rates the ArtStation 1824 for 0.1 mm mechanical precision, ±0.05 mm repeatability at low speeds and a minimum motion resolution of 0.0125 mm. I don’t have the equipment to independently verify those microscopic figures, but in practice, the results were excellent throughout my testing.
Plotting speed depends largely on the artwork, of course. A simple set of gold squares took just 1 minute and 35 seconds, while the dense X-shaped ribbons required around 30 minutes. My three-pass multicolor composition ran for more than 40 minutes in total.
Long plots also highlighted something worth remembering: your drawing tool matters just as much as the machine. Several of my older pens began fading during dense pieces, while fresh fineliners produced beautifully consistent lines. The ArtStation can position a pen with remarkable accuracy, but it can’t put ink on the page if that pen is running dry.
I also learned to keep the connected computer awake during a plot. Since the machine is controlled over USB, my ArtStation paused when my laptop went to sleep and resumed when it woke again. Given the small shift I observed after one of those interruptions, I’d disable auto sleep before starting any important long-duration piece.
Pros & Cons
Pros
- Excellent precision and repeatability
- Huge working area
- Mostly pre-assembled and extremely quick hardware setup
- Accommodates a wide variety of pens and markers
- Easy pen changes and positioning
- Reliable multicolor registration
- Magnetic work surface
- Open SVG-based workflow leaves plenty of room for experimentation
Cons
- Current documentation is confusing and needs a dedicated ArtStation 1824 guide
- Large footprint requires considerable desk space
- Moderately noisy during operation
- Inkscape workflow isn’t particularly polished for beginners
- USB connection means your computer needs to stay connected and awake during plotting
Verdict
I went into this review primarily interested in the ArtStation 1824 as a piece of hardware. I came out of it with a new creative rabbit hole.
The machine itself is excellent. It’s solid, precise, versatile and surprisingly easy to use once you’ve got everything set up. The huge working area gives you plenty of room to experiment, the pen holder handled everything I threw at it, and its repeatability was good enough to produce intricate multicolor pieces with optical effects I hadn’t even anticipated when designing them.
The biggest weakness right now is documentation. UUNA TEK needs a clear, dedicated ArtStation 1824 guide that takes a new owner from opening the box through software installation and their first plot. At US$1,799, that’s something I would expect to find immediately rather than having to piece together instructions from related products.
Thankfully, that initial friction doesn’t reflect the experience of actually using the machine. Once everything was configured, the ArtStation largely disappeared into the background and let me concentrate on making things.
And that’s probably the biggest compliment I can give it.
As I said before, I’m a designer, not a coder, and I started this process with essentially no experience creating generative artwork through code. With ChatGPT helping me translate my art direction into p5.js, I gradually went from a simple black fineliner test to multicolor flowing forms, optical patterns, paint markers, metallic inks and layered compositions.
There was a lot of trial and error along the way, but that became part of the fun. I learned a lot, and by the end I was enjoying the process far more than I expected. I just couldn’t stop playing with this plotter.
Rather than feeling like I’d exhausted the ArtStation’s possibilities by the time I finished testing it, I came away with a growing list of things I want to try next.

Quick Answers
How large is the UUNA TEK ArtStation 1824?
The machine has a 30.4 x 25.7-inch (773 x 653 mm) footprint and offers a 24 x 18-inch (610 x 457 mm) working area, so you’ll need a substantial dedicated surface for it.
How difficult is it to set up?
The hardware is extremely easy to set up because the machine arrives mostly assembled. I had mine physically connected and ready in less than five minutes. The documentation and initial software setup were considerably less straightforward.
What pens can you use with it?
UUNA TEK specifies support for drawing tools up to 16 mm in diameter. I successfully tested regular ballpoint and pigment fineliners, Sharpie Fine Point markers and a thicker POSCA paint marker.
Can it produce multicolor artwork?
Yes. You can export colors as separate SVG layers and swap pens between passes while leaving the paper fixed in place. My three-color test showed excellent registration across the individual layers.
Do you need to know how to code?
Not necessarily. The ArtStation plots vector artwork, so you can use existing SVG designs without writing code. For my generative-art experiments, I used p5.js with help from ChatGPT to create and refine the underlying artwork before exporting it to SVG.
Is it noisy?
Moderately. There’s an obvious mechanical, robotic sound as the carriage moves around the frame. I didn’t find it unpleasant, but I probably wouldn’t run it continuously beside other people in a shared office.
How long does a plot take?
It depends almost entirely on the complexity of the artwork. During my testing, individual pieces ranged from less than two minutes to around 30 minutes, while a dense three-color artwork took just under 42 minutes across three separate passes.
What is the biggest downside?
At the time of testing, documentation. UUNA TEK is preparing dedicated ArtStation 1824 instructions, but I think a clear model-specific guide should already be available for a product at this price.
This post contains affiliate links to partner brands. We earn a small commission if you click the link and make a purchase. There is no extra cost to you, so it’s just a nice way to help support the site. The product featured in this article was provided by the manufacturer for testing purposes. No payment was received for this feature, and the opinions expressed are entirely our own. All images © Inspiration Grid unless otherwise credited.




More
articles
Inspiration
in your inbox
Amazing art & design, never any spam.
We care about protecting your data. Please refer to our Privacy Policy for more.
- Advertising
- Architecture
- Art
- Branding
- Fashion & Beauty
- Gaming
- Graphic Design
- Illustration
- Industrial Design
- Interior Design
- Logo Design
- Packaging Design
- Photography
- Pop Culture
- Print Design
- Product Design
- Technology
- Typography
- UX & UI Design
- Vehicle Design
- Video & Motion
© 2026 Inspiration Grid, all rights reserved. Some of our posts may contain affiliate links to partner brands. We earn a small commission if you click the link and make a purchase. There is no extra cost to you, so it’s just a nice way to help support the site. All images, videos, and other content posted on the site is attributed to their creators and original sources. If you see something wrong here or you would like to have it removed, please contact us.