

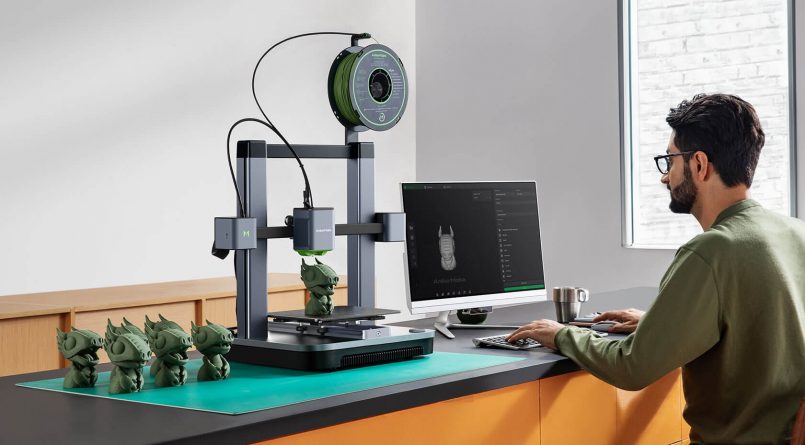
AnkerMake M5C 3D Printer Review: 3D Printing Made Easy
Published Sep 16, 2023
Includes affiliate content
3D printing is an exciting and constantly evolving technology that can take the wild, wacky and wonderful ideas from our minds and bring them into reality.
Getting started however, can be a challenging endeavor. From wrapping your head around the technology and learning about different materials, to mastering the various software and hardware settings, it can all be quite dauting. On top of that, setting up a 3D printer can be complex, and the initial investment can be substantial.
With all of this in mind, AnkerMake has recently released their new M5C 3D printer, which aims to deliver an affordable, fast, highly precise and user-friendly experience to both beginners and seasoned 3D printing enthusiasts.
In this article, we will take a deep dive into this innovative piece of tech, exploring its key features, performance, ease of use, and overall value for money. So, let’s get started, and see what the AnkerMake M5C 3D printer is all about.
What’s in the Box?
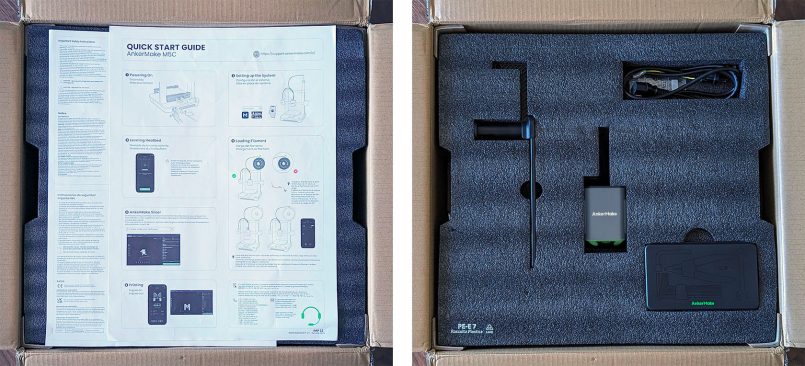
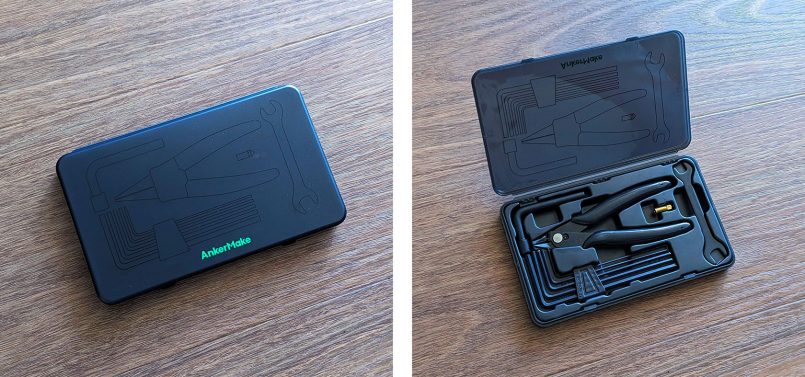
The AnkerMake M5C comes in a large cardboard box, where all the components are neatly stacked. Inside it, you’ll find the machine parts, a detailed installation guide and a nice little toolbox with everything you need to assemble this 3D printer.
Specs
Before we look at the design of the M5C, let’s go over some of the technical details. The printer’s overall dimensions are 466×374×480 mm³ (without the filament holder), so this unit should be able fit comfortably in various settings. Despite its solid build, it weighs just 11Kg (24.2 lbs), making it relatively easy to move around when needed.
When it comes to the printable area, the M5C offers a slightly smaller print size than the AnkerMake M5, coming in at 220×220×250 mm³, which is still ample for most projects.
This machine can achieve printing speeds of up to 500 mm/s and a max acceleration of 5000 mm/s², although the standard 250 mm/s speed yields better results.
It also features an all-metal hotend, delivering a welcome improvement over the M5, which initially shipped with some plastic tubing inside. This new hotend can reach a maximum temperature of 572°F (300°C), enabling it to handle a wide range of filament materials including PETG/PET, ABS, TPU, PA, PLA-CG, PETG-CF, and PA-CF. This versatility allows users to experiment with a range of different materials for their projects.
The connectivity options offered by the M5C include WiFi, Bluetooth and USB-C, offering flexibility in how you send your design files to the printer.
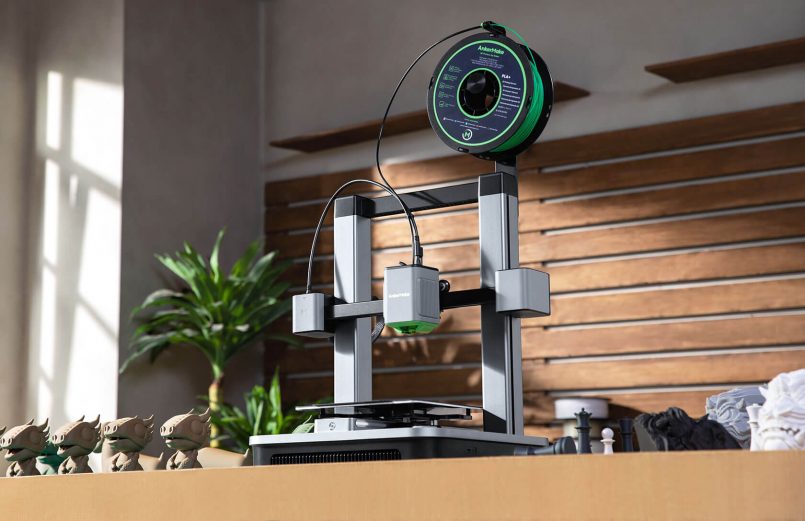
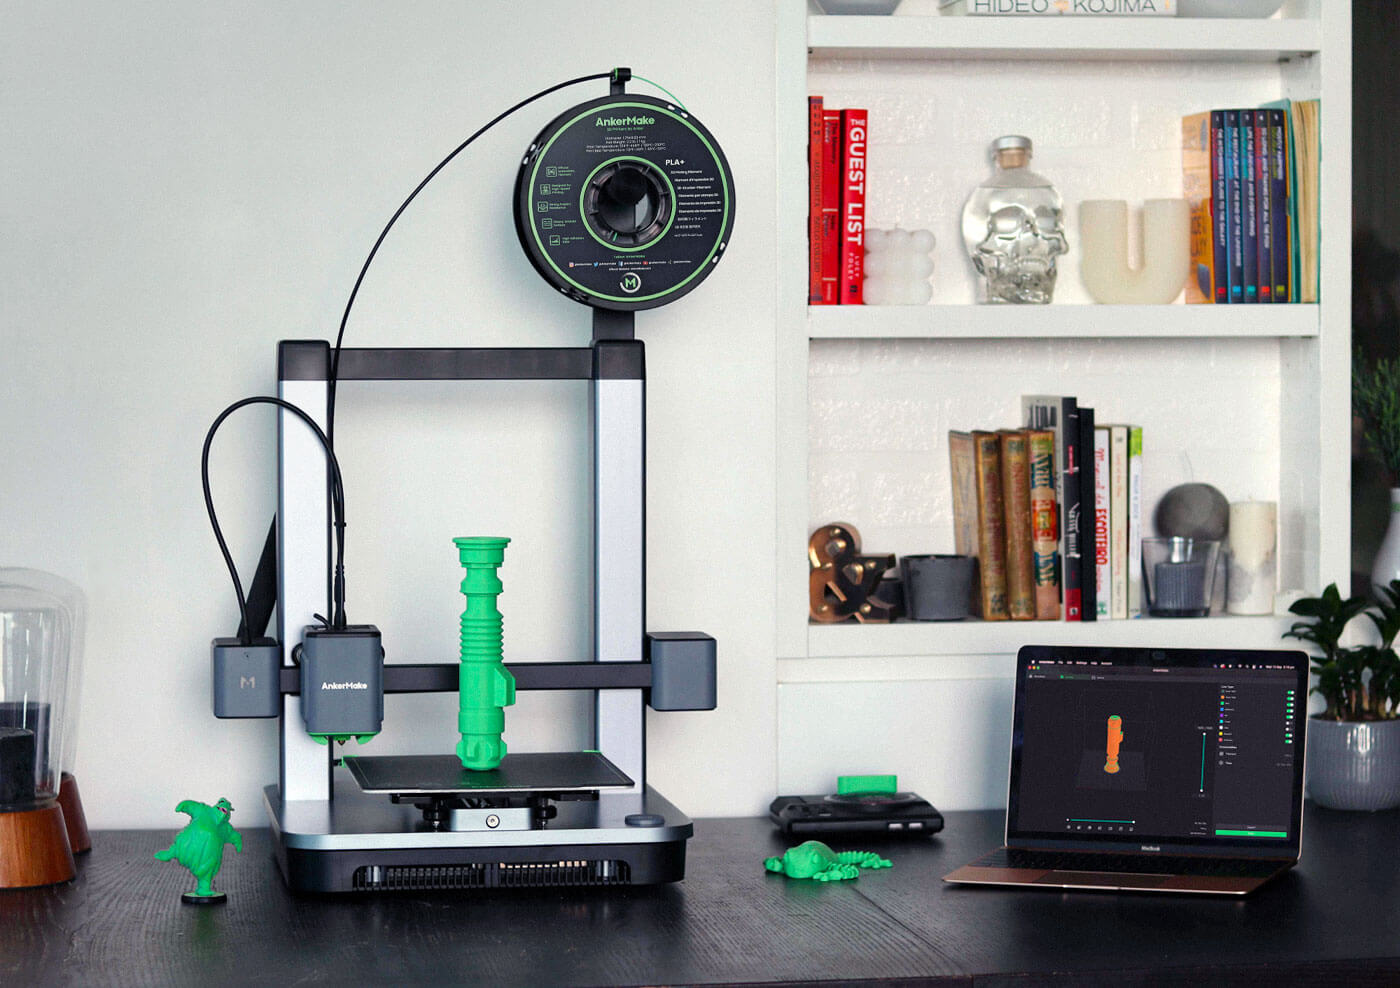
Design and Build Quality
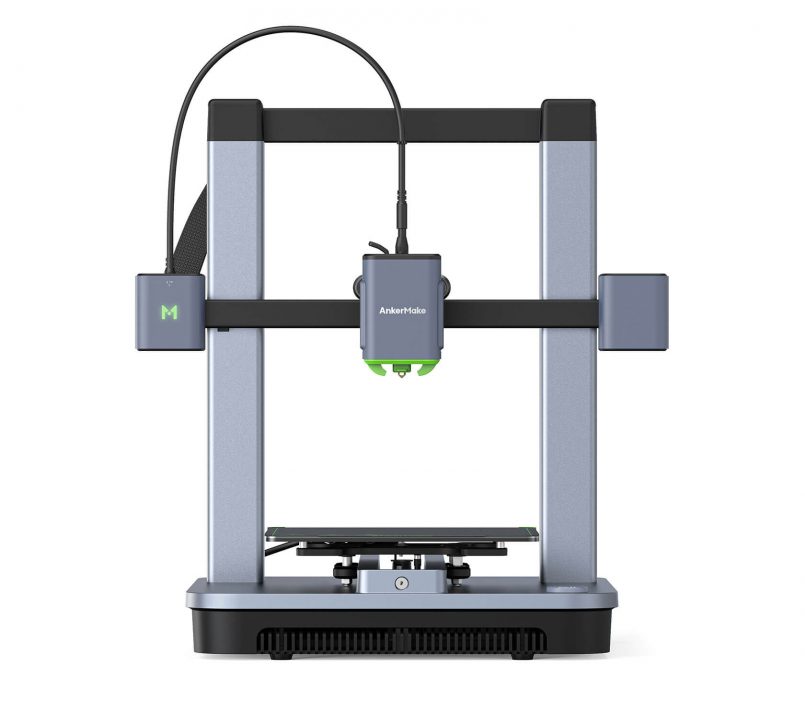
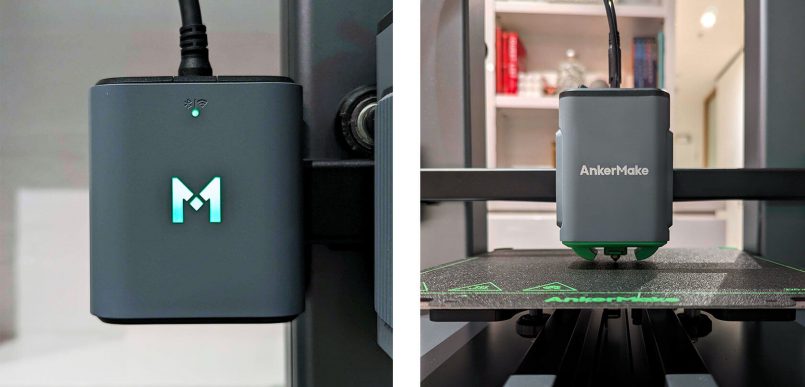
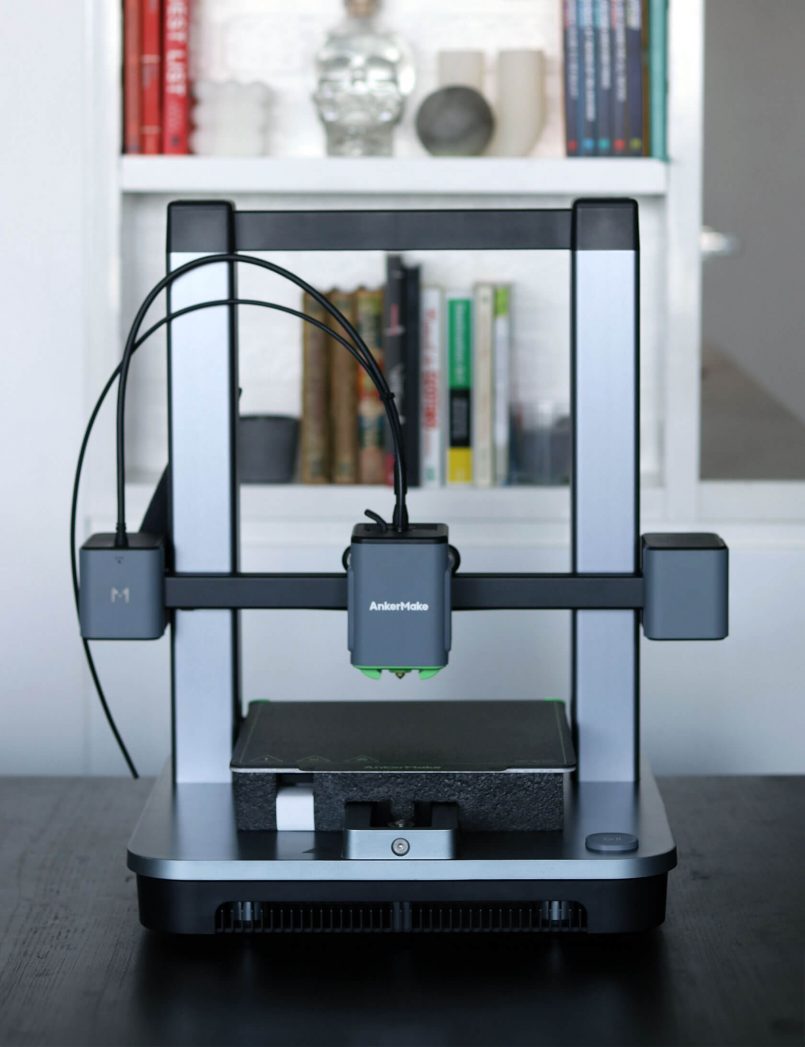
In terms of design, the AnkerMake M5C is very similar to the M5, and might also look familiar when compared to other bedslingers on the market. Having said that, it looks more refined than its competitors, with clean lines, rounded edges and some nice design touches throughout. The absence of a screen (more on that later), which was present on the M5, makes the whole structure look more symmetrical as well.
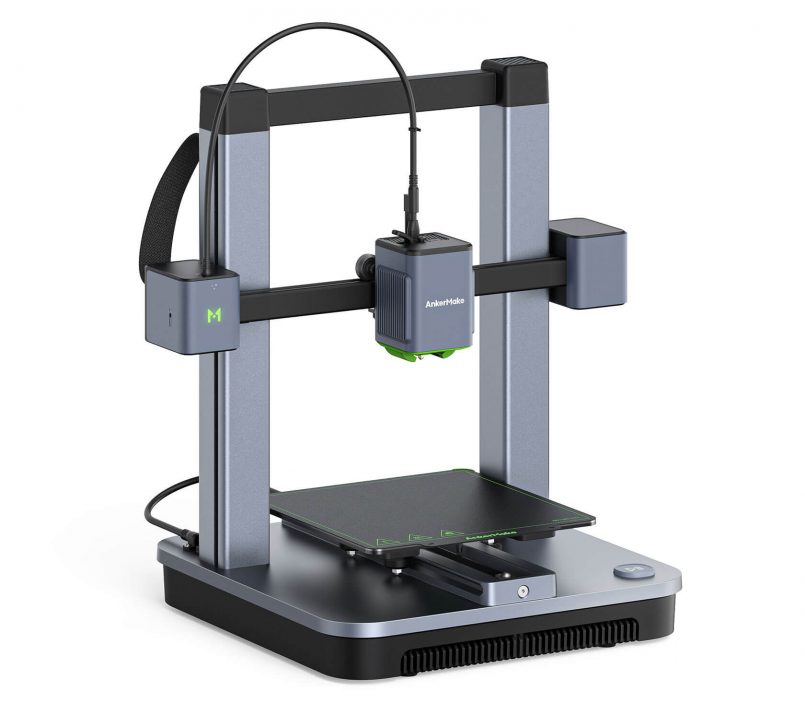
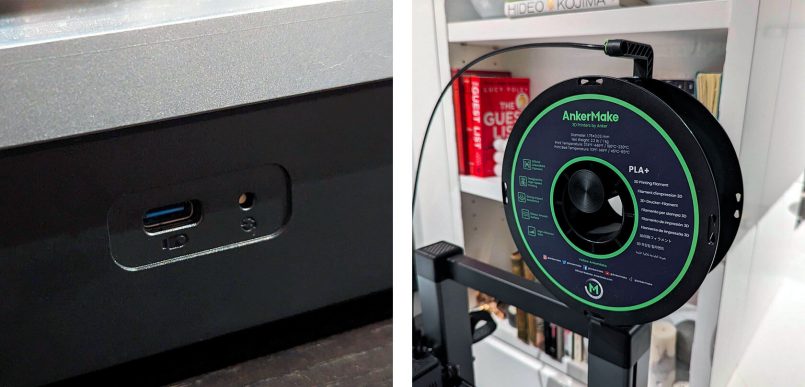
The power button is located at the back of the unit, and on its side you’ll find a small reset button and a USB-C port which can be used to print models from an external drive. A regular USB port would’ve been a welcome addition here, since most users have plenty of standard USB sticks readily available. If this applies to you, using a basic USB-C hub or adapter can be a good option to expand the M5C’s connectivity.
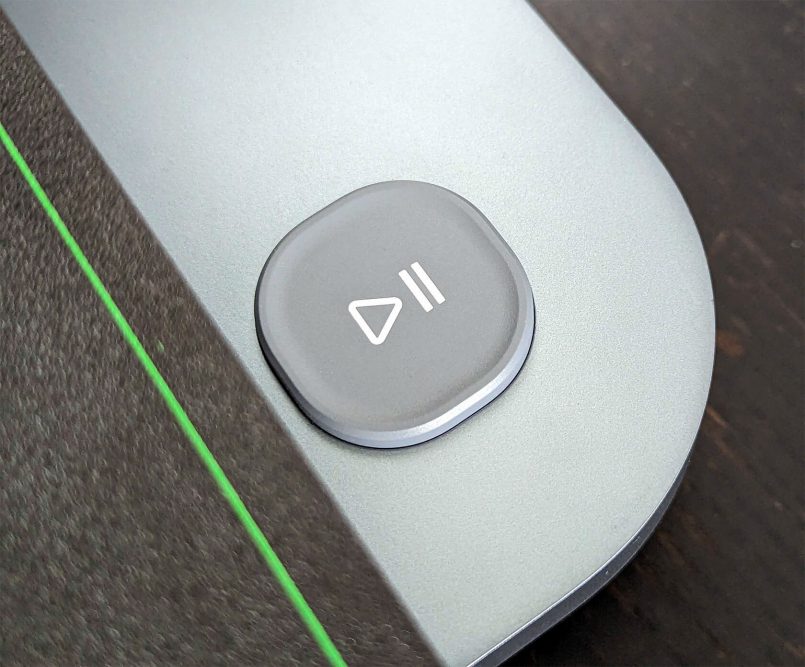
We briefly mentioned the lack of a screen earlier, and we feel like AnkerMake took a bit of a gamble in removing it from this new printer. Users are now required to download an app to perform actions such as leveling the bed, homing, adjusting the temperature or monitoring the printing process. A large customizable button on the base of the unit can also be used for a few pre-defined functions (more on that later).
Taking all of that into consideration, it is important to note that the AnkerMake app is very well designed and intuitive, so the lack of a screen isn’t really a big deal. Plus, if you’re like us and have your phone with you all the time, the printer’s controls will always be within reach.
Another omission when compared to the M5 and other printers is the built-in camera. The M5C doesn’t have one, so you won’t be able to visually monitor your prints when you’re away from the printer.
In the end, these strategic decisions by AnkerMake actually turned out to be a really smart move, helping bring the costs down and making this printer more affordable and accessible to a wider audience, without making any compromises on print speed and quality.
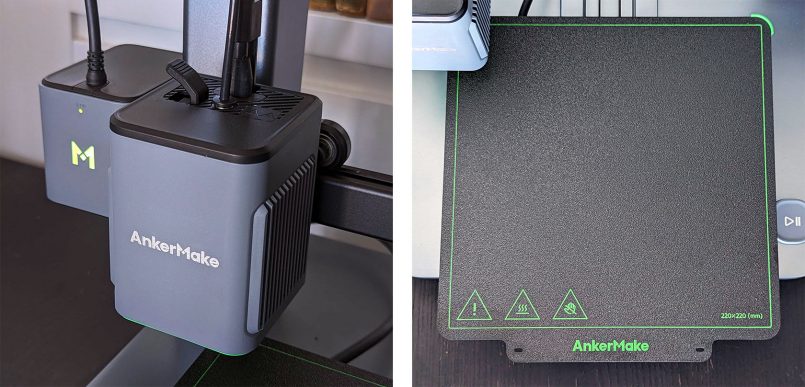
The overall build of this 3D printer is remarkable. The aluminium base and frame are quite rigid and well constructed, the magnetic build plate is easy to install and remove, and all the materials feel premium.
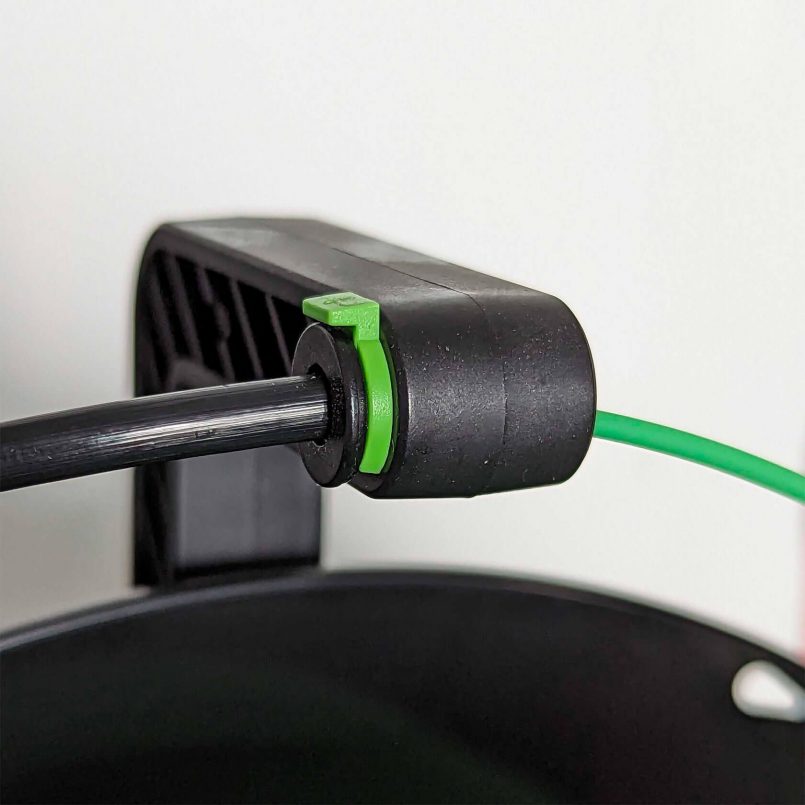
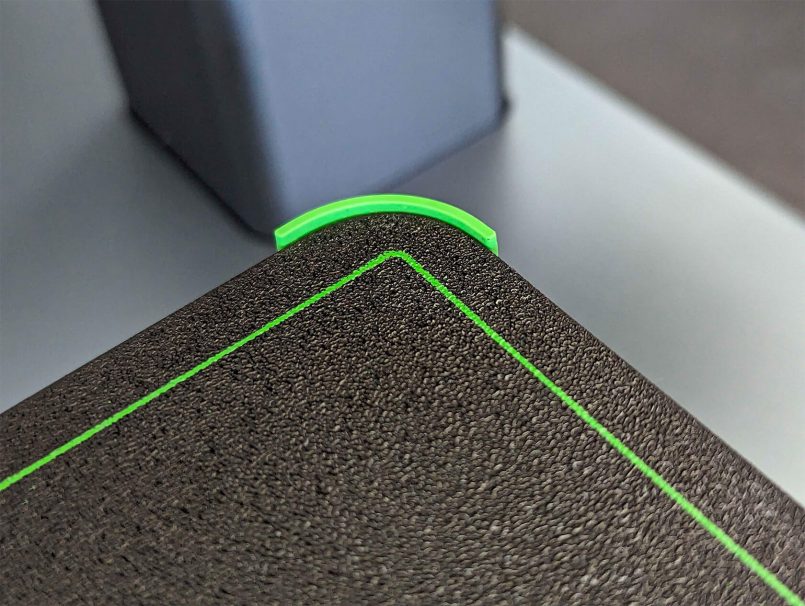
However, there’s one small element that doesn’t quite show the same level of thought as the rest of the assembly. The filament holder includes a small green clip made of plastic, which is supposed to hold the bowden tube in place as you insert the filament. Unfortunately, this attachment is not tight enough and the tube often comes loose. In our testing we needed an extra pair of hands to hold the fitting in place, in order to complete the filament insertion process. Bear in mind that this may only be an issue with our particular unit, and it’s also worth pointing out that this does not affect the printing process or quality whatsoever. Once the filament is loaded, everything works as it should.
Getting started
The installation process is very straightforward and takes about 15 to 20 minutes. All you need to do is follow the included assembly guide, which takes you through all the steps required to put this 3D printer together. As mentioned previously, the product comes with a small toolbox that includes everything you’ll need for the assembly.
Once everything is assembled, you will need to install the AnkerMake app in order to remotely connect to the printer and perform basic operations.
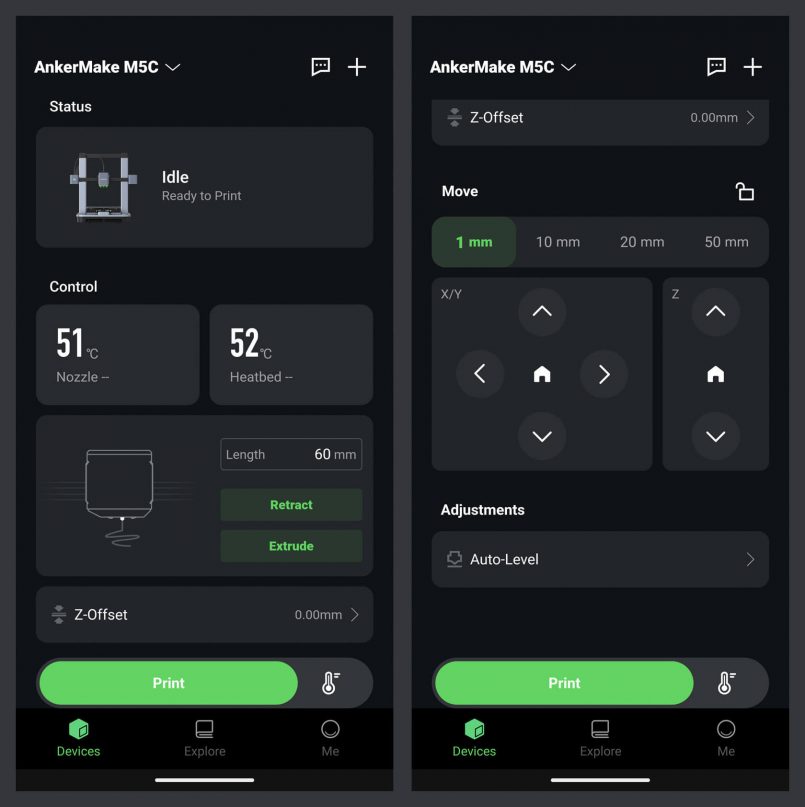
The app’s user interface is polished and well-organized, featuring simple modules that provide a clear overview of all the necessary controls and printer details. These include indicators for nozzle and heatbed temperature, Z-offset adjustment, homing and auto-leveling.
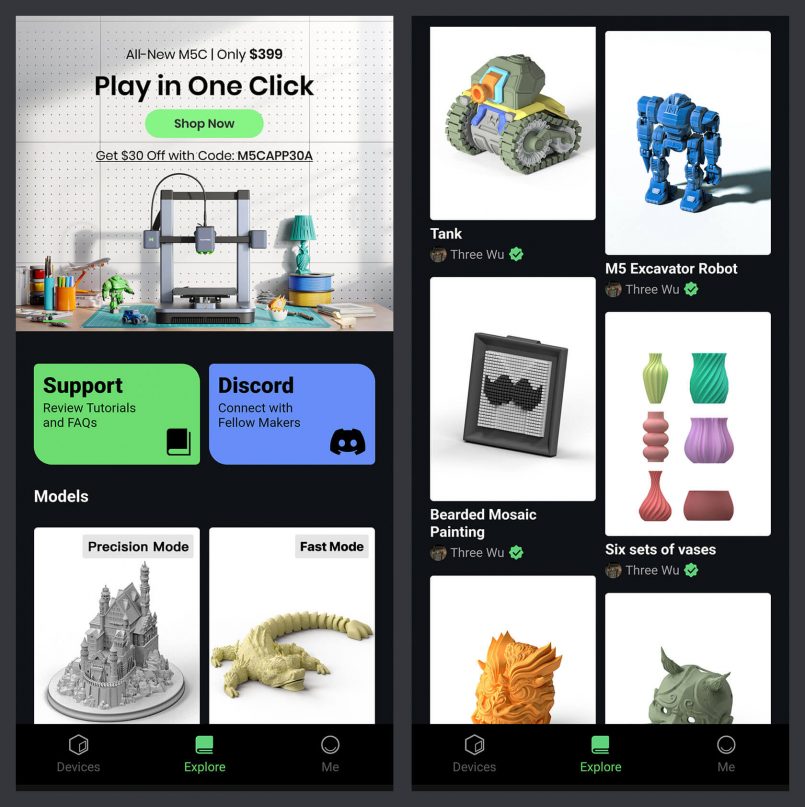
A separate “Explore” tab offers a selection of pre-sliced AnkerMake models that can be printed directly from the app. This is great if you’re just getting started in 3D printing or if you want to test things out for the initial runs.
The large play/pause button on the unit can also be configured using the app. By default, a single tap prints the latest file in your USB drive, double tap reprints the last file, and if you hold the button for 3 seconds the printer starts its the auto-leveling process. While printing, you can pause your print job with a single tap or cancel it completely by holding the button for 3 seconds.
Performance
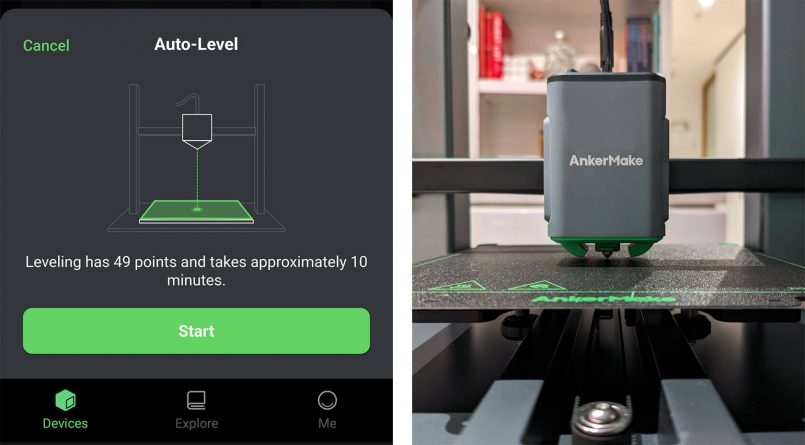
Once you have successfully assembled the M5C and established a connection with the AnkerMake app, you will receive a prompt to perform the printer’s auto-leveling function. This takes about ten minutes and then you will be good to go.
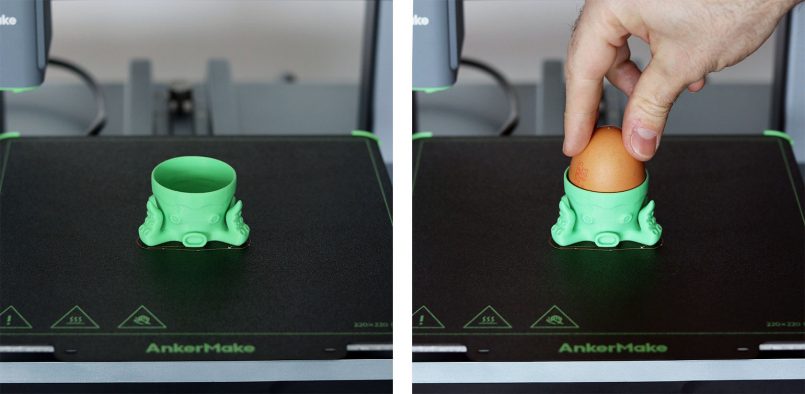
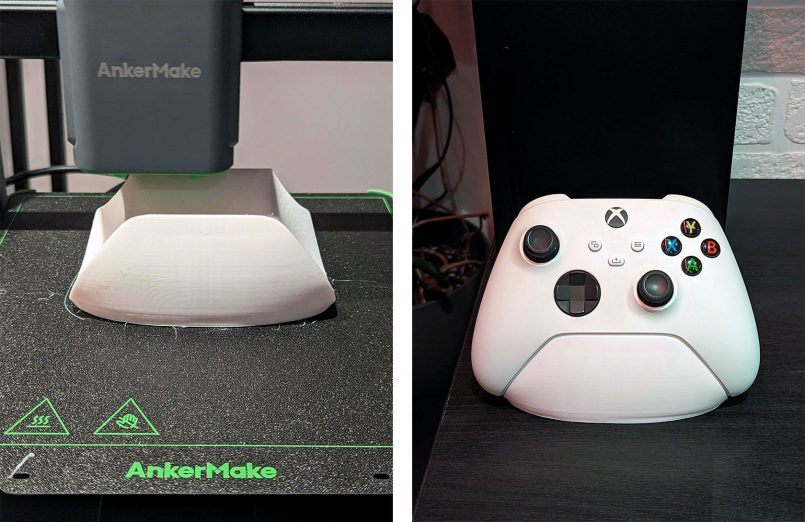
For our initial test print, we decided to steer away from the familiar benchy boat that you’ll see in every 3D printer review and went with this little octopus egg holder instead. This is one of the pre-sliced models included in the AnkerMake app.
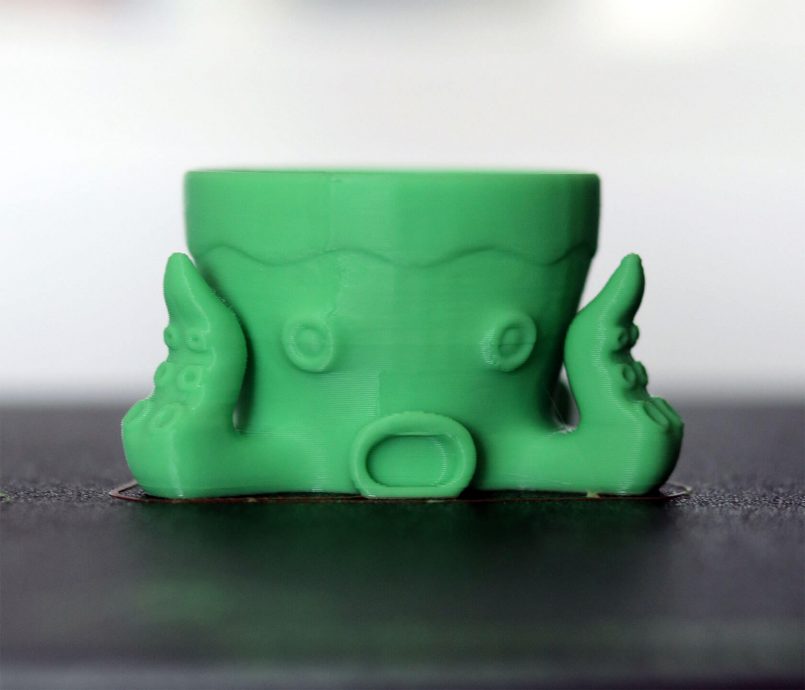
Immediate first impression: this compact printer is very fast. Watching the M5C’s sharp, precise movements for the first time was quite mesmerizing. It doesn’t get too loud either, with cooling fans that are much quieter when compared to similar machines on the market. This first test print took about 45 minutes to complete and turned out great, so we were off to a good start.
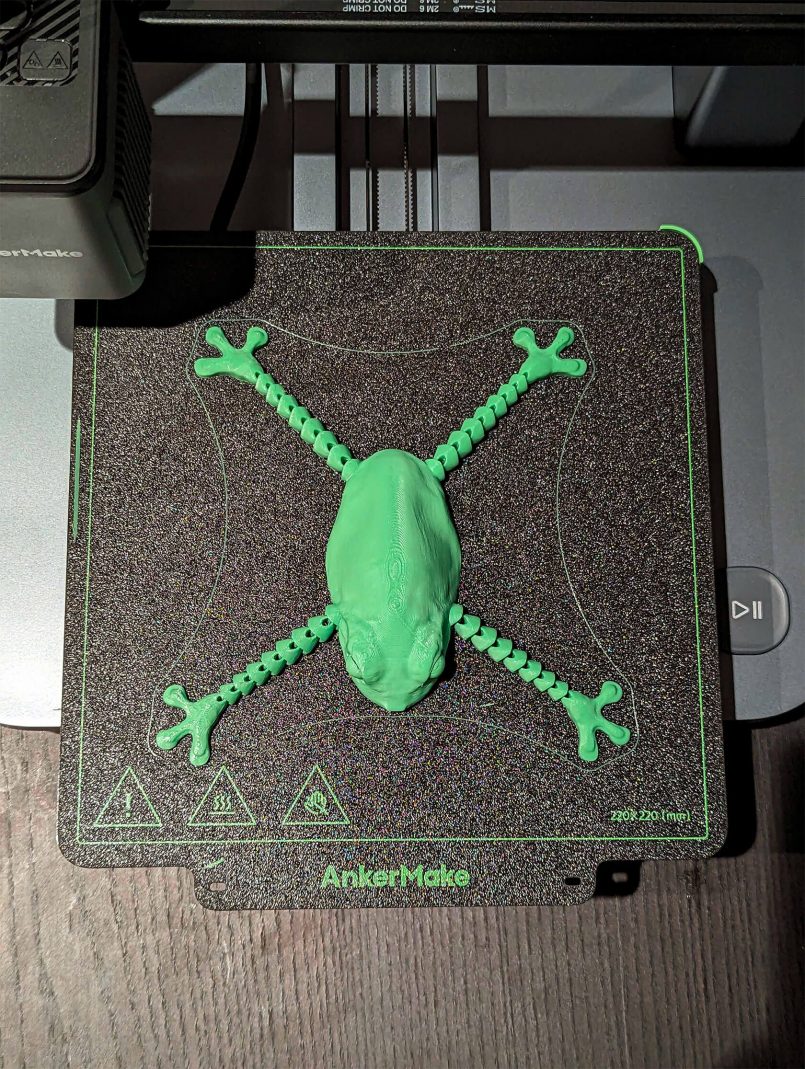
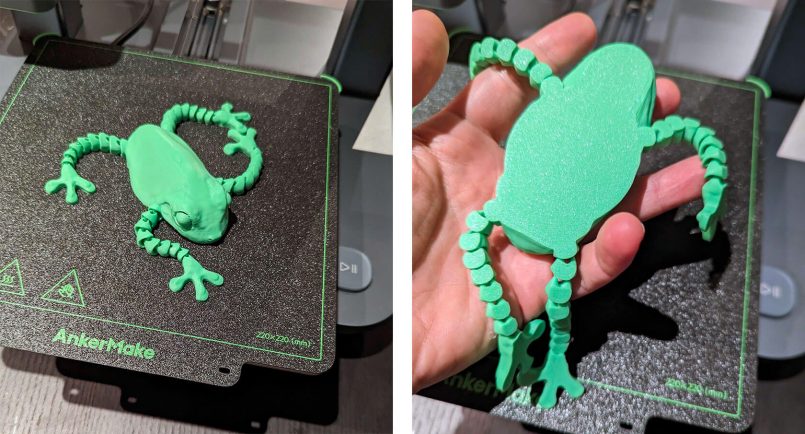
Next up, we wanted to try something a bit more complex, so we selected this posable frog model with articulate joints. The whole model is designed to be printed as one, with no assembly required. We’ll call this little guy Kermit.
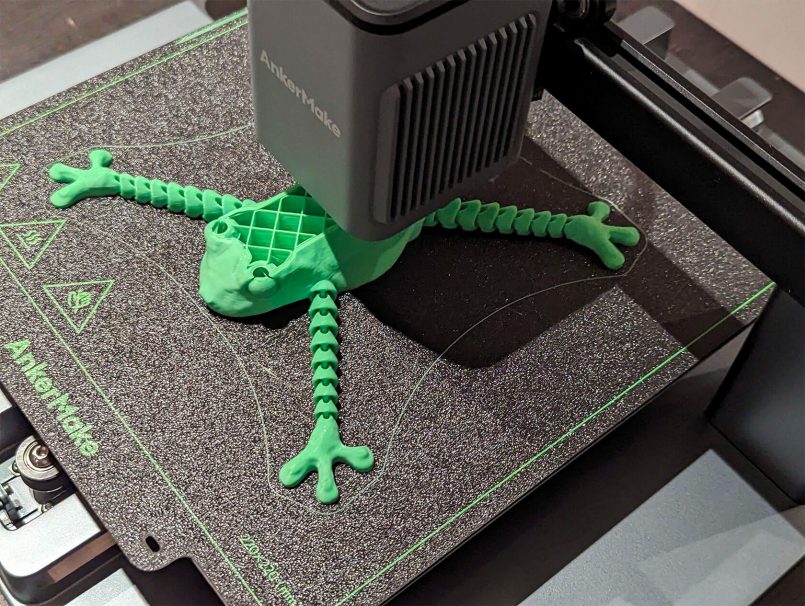
After 1 hour and 50 minutes, Kermit also came out beautifully. The print looks clean with nice details, and the flexible joints worked out perfectly.
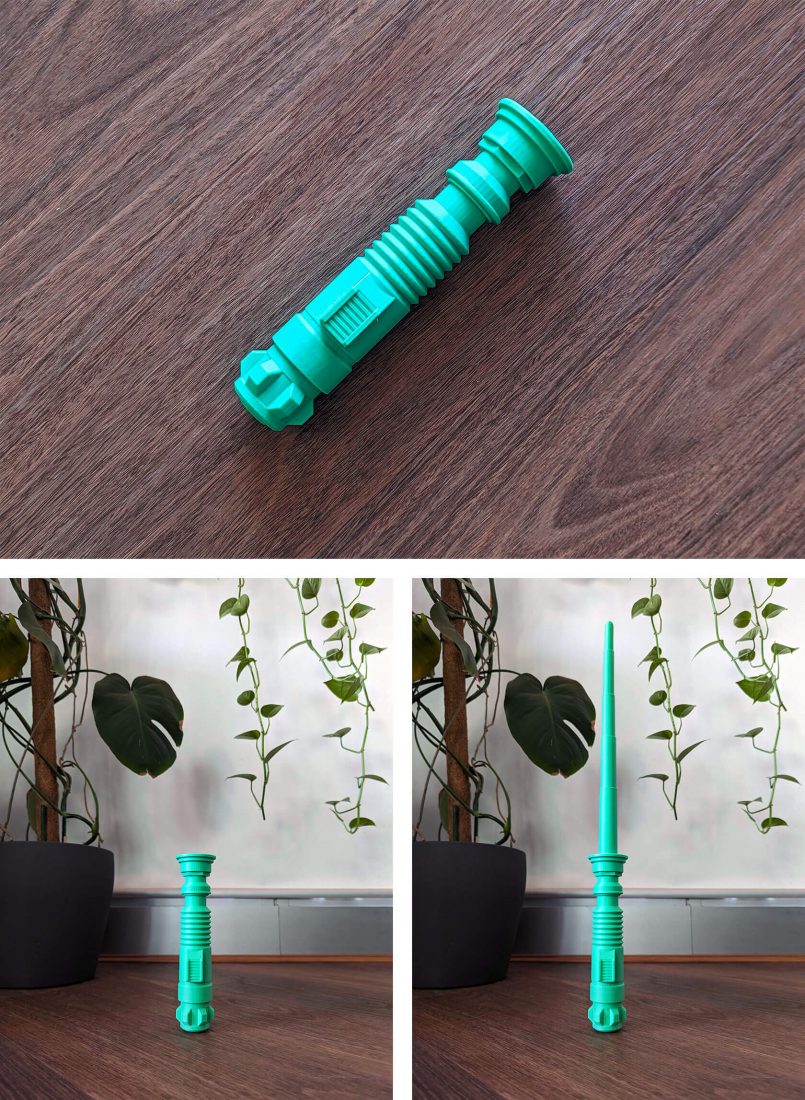
As we gradually progressed into more complex builds, we looked for a vertical structure and decided on this retractable lightsaber, a free print-in-place model that is available on Printables. As this isn’t one of the pre-sliced options offered by the AnkerMake app, we had to rely on the AnkerMake Slicer software (currently in beta) in order to get things ready.

Apart from the lack of some key features in its current beta state, the software works well enough and the interface is clean. By default, it’s set to an “Easy mode” that takes most of the complexities out of the equation for beginners. If you know what you’re doing, however, you’ll have the option delve deeper into the more advanced settings that are available when switching over to the expert mode.
After slicing the model and moving forward with our print job, this project took about 5 hours and 15 minutes to complete, and once again the M5C delivered. You can take a look at the final results below:
A high quality 3D printer like the M5C truly opens up a world of possibilities, and as we moved on from the initial test prints, we started thinking about all the models we could build for our own creative projects, or even useful things to have around the house. Check out the images below for some of the other designs we printed during our testing, including a KISS logo for a good friend who is a die-hard fan of the band.
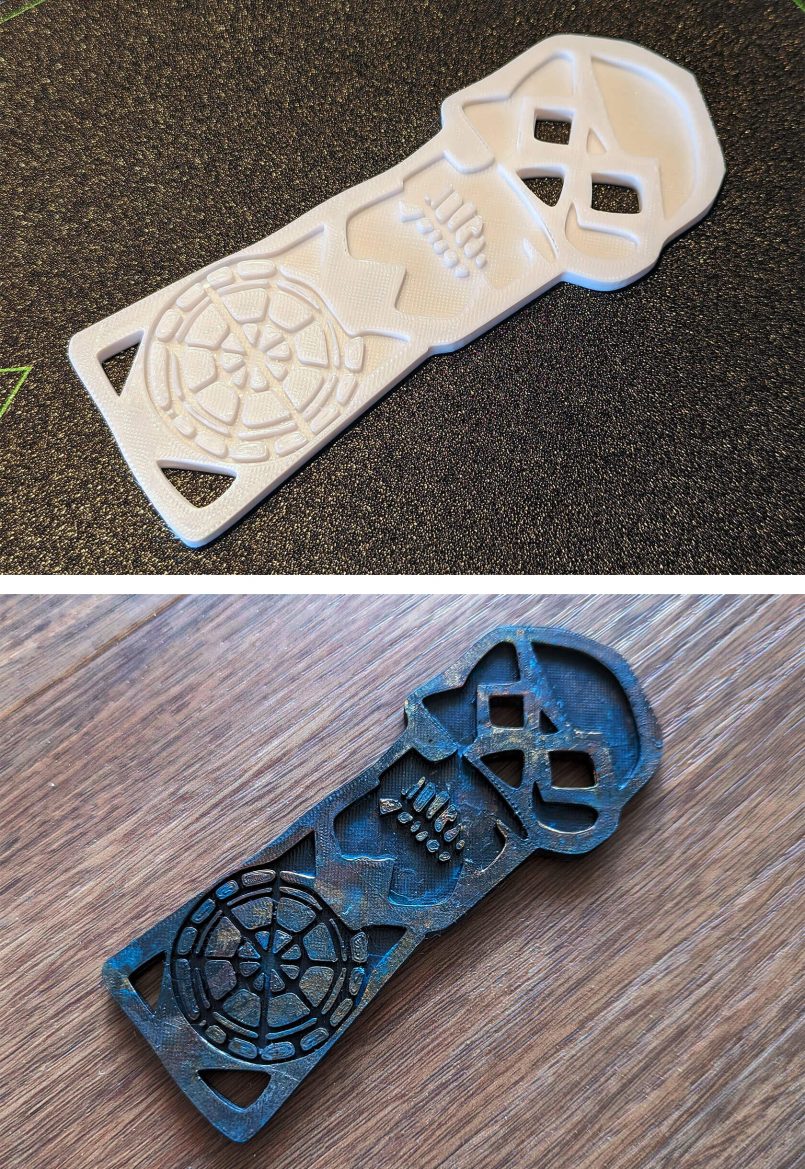
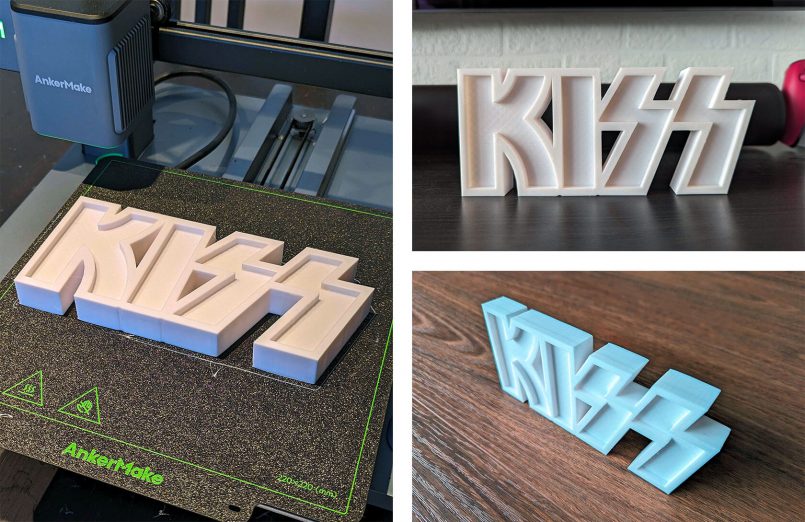

We were thoroughly impressed by the exceptional quality of the projects we created using the AnkerMake M5C. The speed and precision that this compact unit can achieve is nothing short of remarkable. The models came out with fairly smooth surfaces, and all the visual details were neatly captured. We can’t wait to keep pushing the boundaries and exploring new possibilities with this machine.
Pricing
Priced at $399.00 (USD), the AnkerMake M5C is an affordable entry point for those looking to get into 3D printing, or anyone looking for an additional, more compact printer for their projects. AnkerMake managed quite a feat in developing a 3D printer with a highly competitive price point, without compromising on build quality, speed or performance.
If you’re interested in picking up the AnkerMake M5C, you can use the discount code ANKERMAKEM5C30 on their website to get $30 off until September 30, 2023.
Pros & Cons
Time to summarize our thoughts as we look at the pros and cons of the AnkerMake M5C:
Pros
- Excellent design and build quality
- Easy to assemble with the included toolkit and instructions
- Perfect for beginners, with user-friendly features
- Fast and precise
- Consistently great print quality
- The AnkerMake app is intuitive and well-designed
- Affordable price point
Cons
- No camera included, so prints can’t be visually monitored remotely
- Flimsy bowden tube holder
- The Slicer software still needs some work
Verdict
In conclusion, the AnkerMake M5C 3D Printer is a well-rounded, affordable entry point into 3D printing that left us extremely impressed with the quality results it delivers. Despite a few omissions when compared to more advanced printers in the market, its speed, precision and user-friendly features make it a solid choice for anyone venturing into the exciting world of 3D printing. If you’re in the market for a reliable, high-performance 3D printer, the AnkerMake M5C is definitely worth considering.
Use the discount code ANKERMAKEM5C30 on Ankermake’s website to get $30 off until September 30, 2023.
This post contains affiliate links to partner brands. We earn a small commission if you click the link and make a purchase. There is no extra cost to you, so it’s just a nice way to help support the site. The product featured in this article was provided by the manufacturer for review purposes, however, the opinions expressed are entirely our own.


More
articles

Inspiration
in your inbox
Amazing art & design, never any spam.
We care about protecting your data. Please refer to our Privacy Policy for more.

- Advertising
- Architecture
- Art
- Branding
- Fashion & Beauty
- Gaming
- Graphic Design
- Illustration
- Industrial Design
- Interior Design
- Logo Design
- Packaging Design
- Photography
- Pop Culture
- Print Design
- Product Design
- Technology
- Typography
- UX & UI Design
- Vehicle Design
- Video & Motion
© 2024 Inspiration Grid, all rights reserved. Some of our posts may contain affiliate links to partner brands. We earn a small commission if you click the link and make a purchase. There is no extra cost to you, so it’s just a nice way to help support the site. All images, videos, and other content posted on the site is attributed to their creators and original sources. If you see something wrong here or you would like to have it removed, please contact us.